Stores on Shopify Standard Plans
Thank you for choosing TaxWisp to streamline your tax exemption process and enhance your customers' shopping experience. This installation guide is designed for stores on Shopify's standard plans (Basic Plan, Grow Plan and Advanced Plan) and helps you to successfully install TaxWisp on your store.
Follow these simple steps to install the Tax Wisp App:
Step 1: Access the Shopify App Store
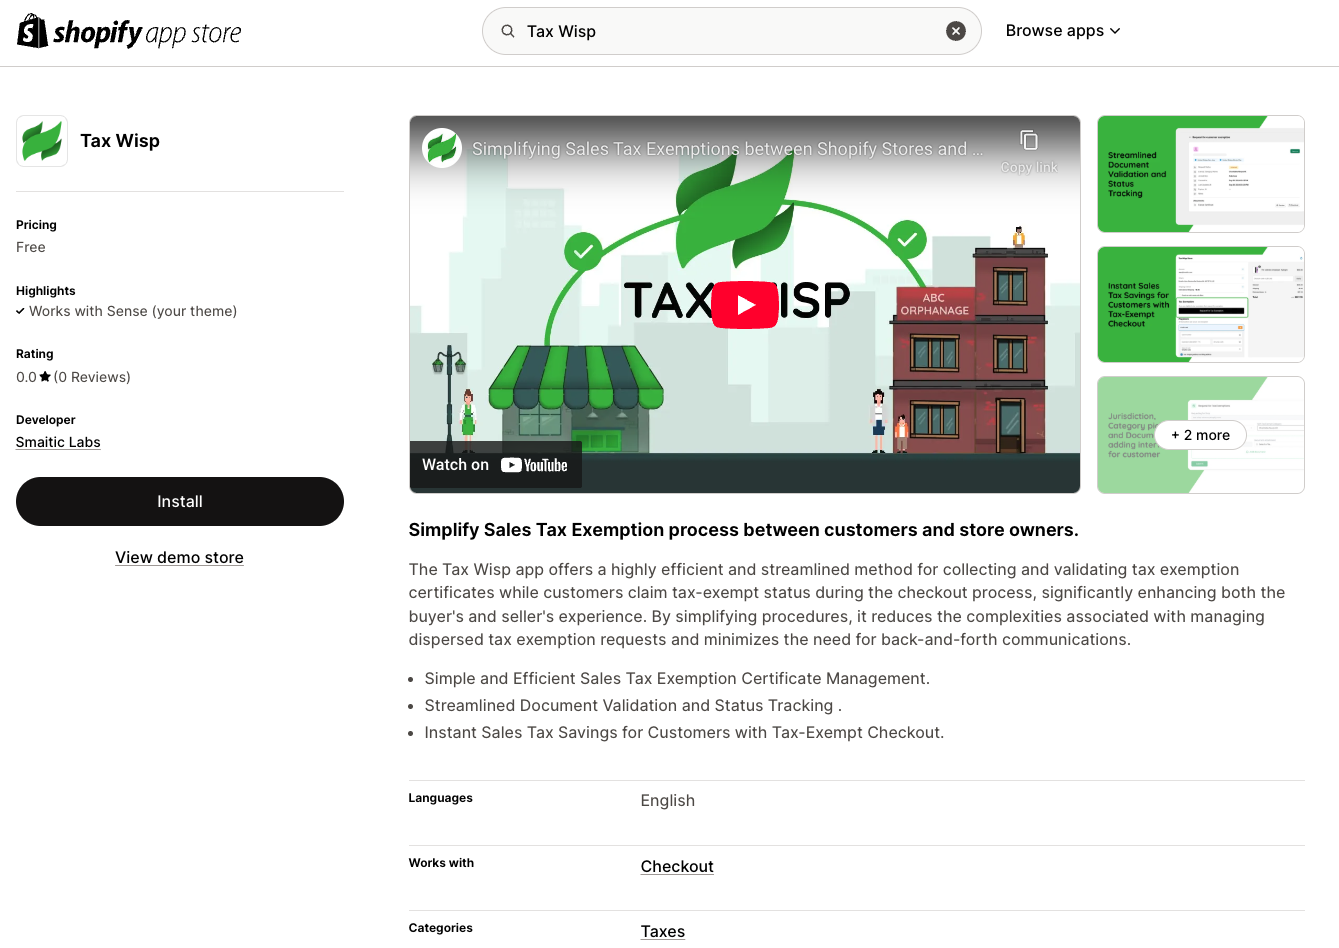
Alternatively, open your web browser and navigate to the Shopify App Store. Use the search bar to find the TaxWisp App.
Step 2: Install the App
- Once you have located the TaxWisp Shopify App, click on it to view more details.
- Review the app description and features to ensure it meets your requirements.
- Click on the "Install" button to initiate the installation process.
Step 3: Log in to Your Shopify Account
- You will be prompted to log in to your Shopify account if you're not already logged in.
Step 4: Installing TaxWisp
-
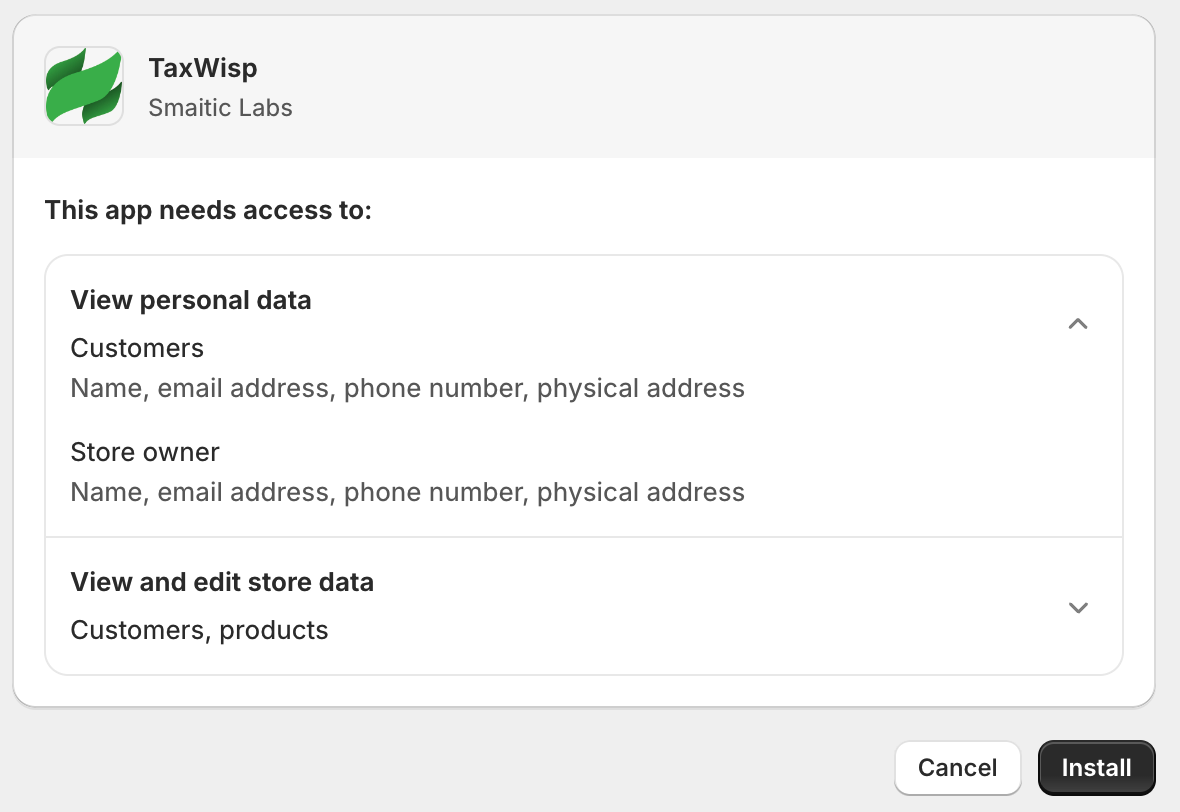
After logging in, Shopify will ask for permission to install the TaxWisp app on your store. Review the permissions requested and click "Install app" to continue. TaxWisp needs access to store data including customers, store owner and products within the shopify store.
-
Follow any additional prompts or instructions provided by Shopify to complete the installation process.
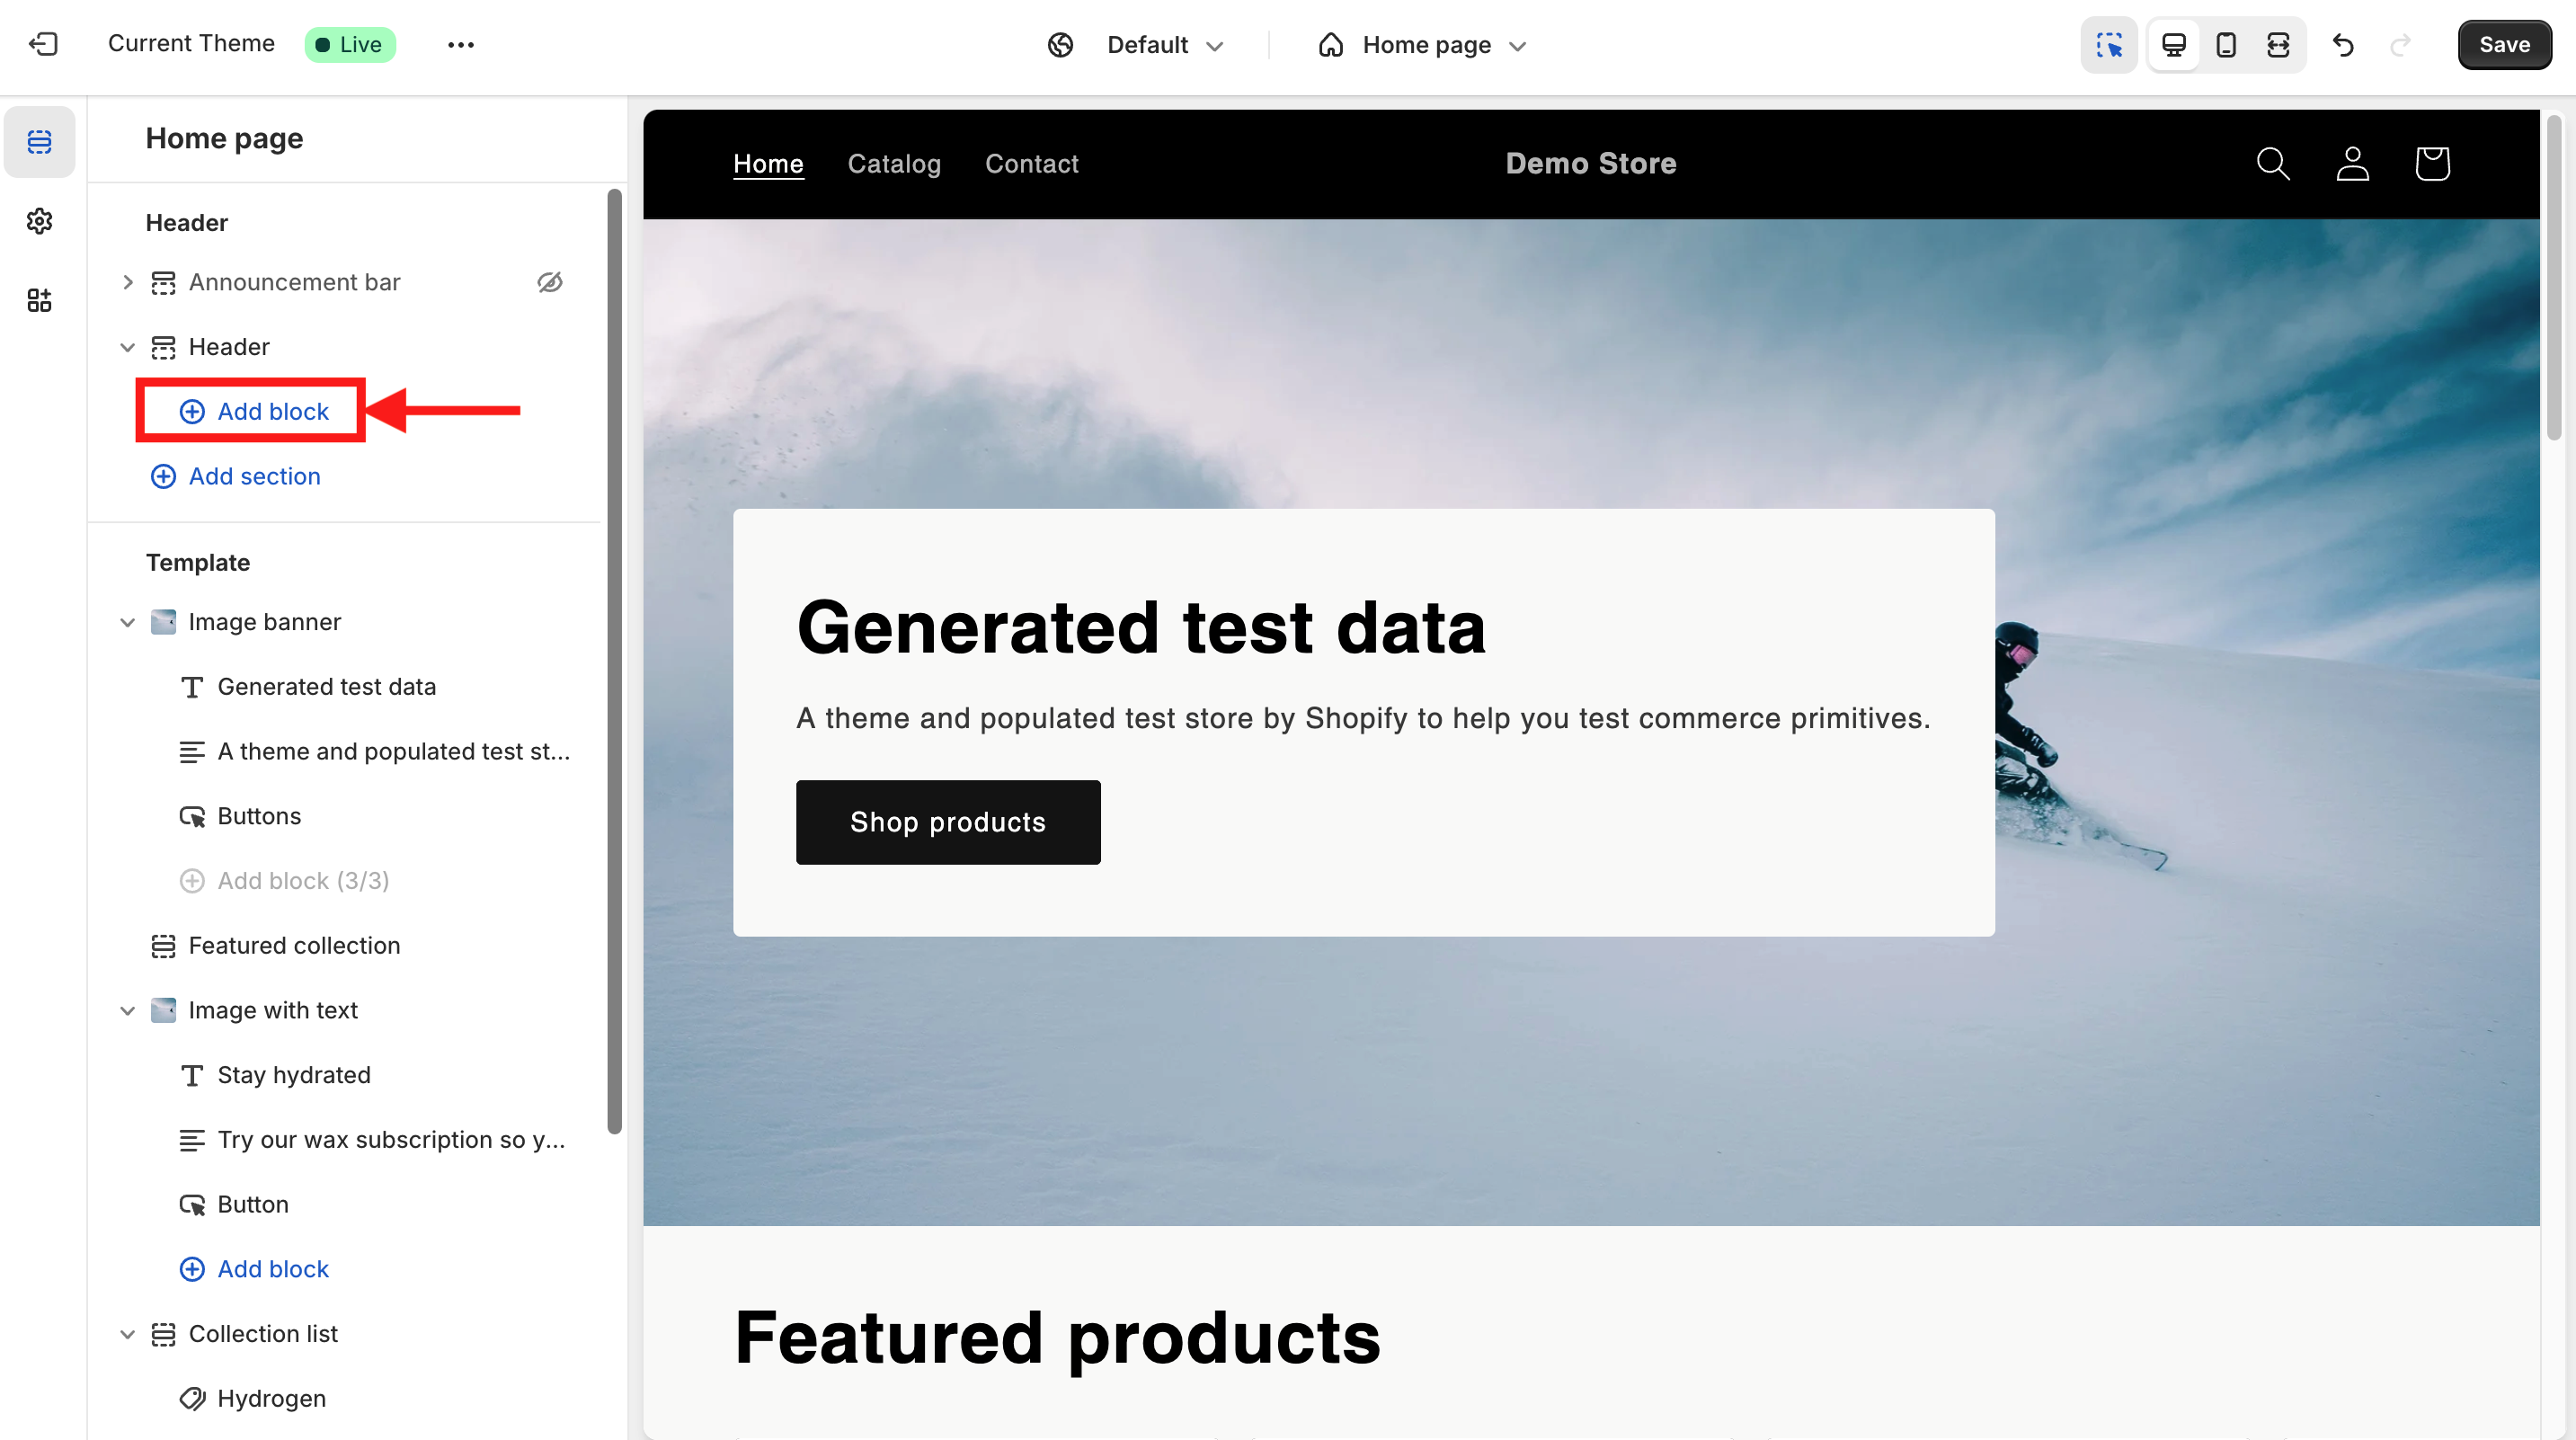
Step 5: Adding TaxWisp App Icon (%) on Your Online Store Header
After successfully installing the app, follow these steps to enable TaxWisp on your online store. This is a crucial step, as customers won’t be able to access the TaxWisp app without enabling it in your store.
-
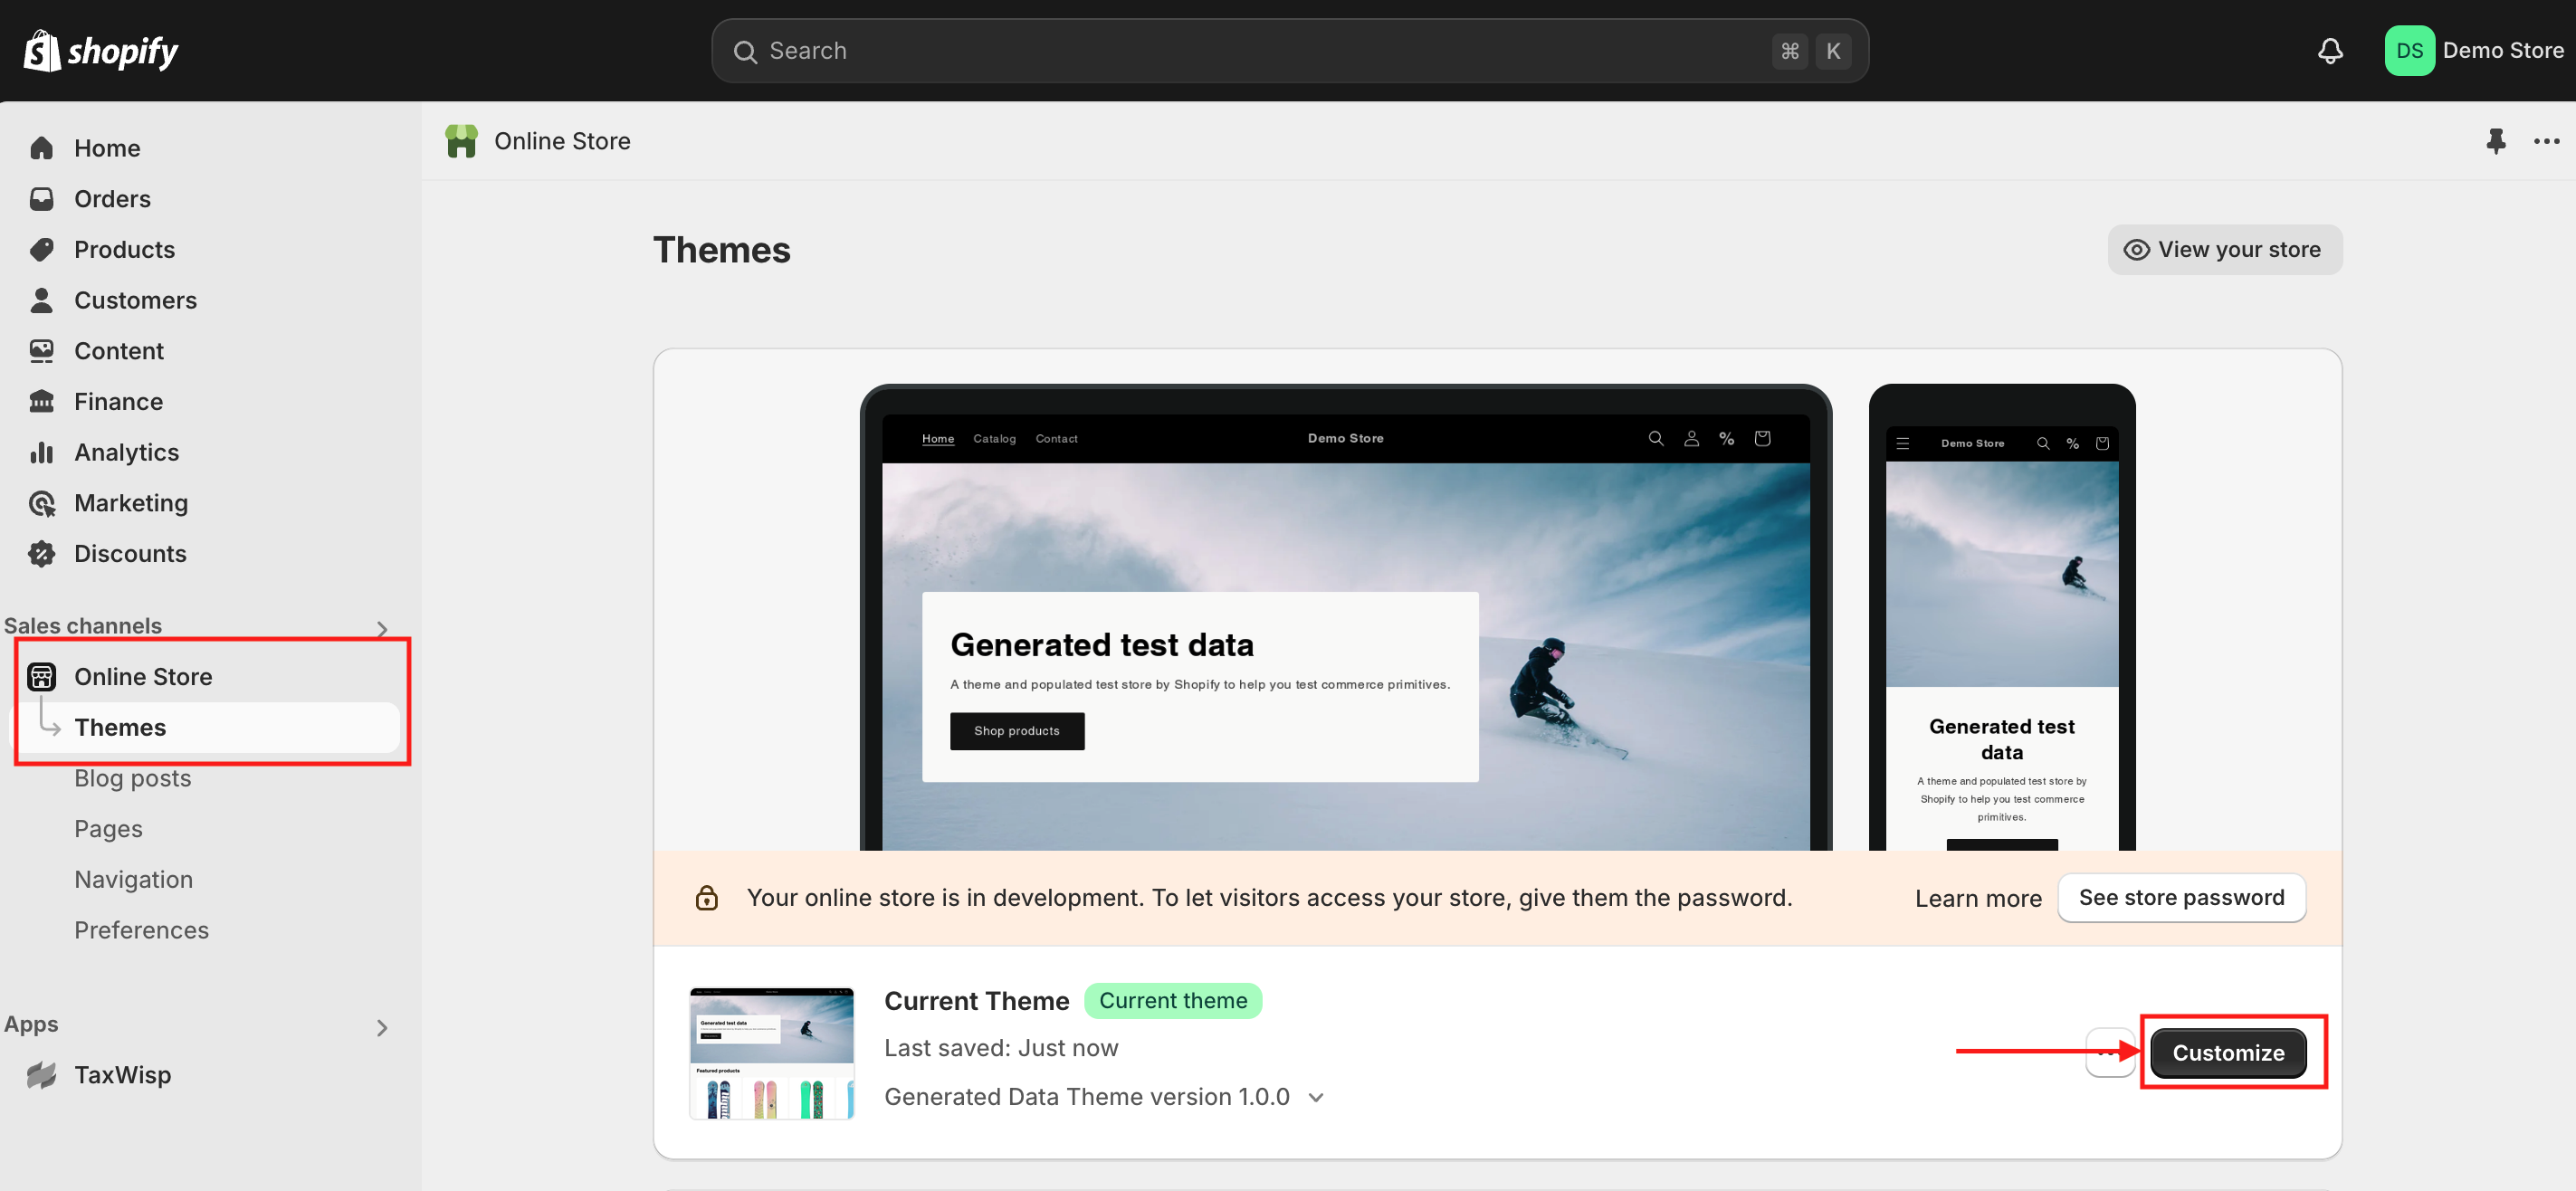
In your Shopify Admin, navigate to Online Store under Sales Channels, then click on Themes and select Customize.
-
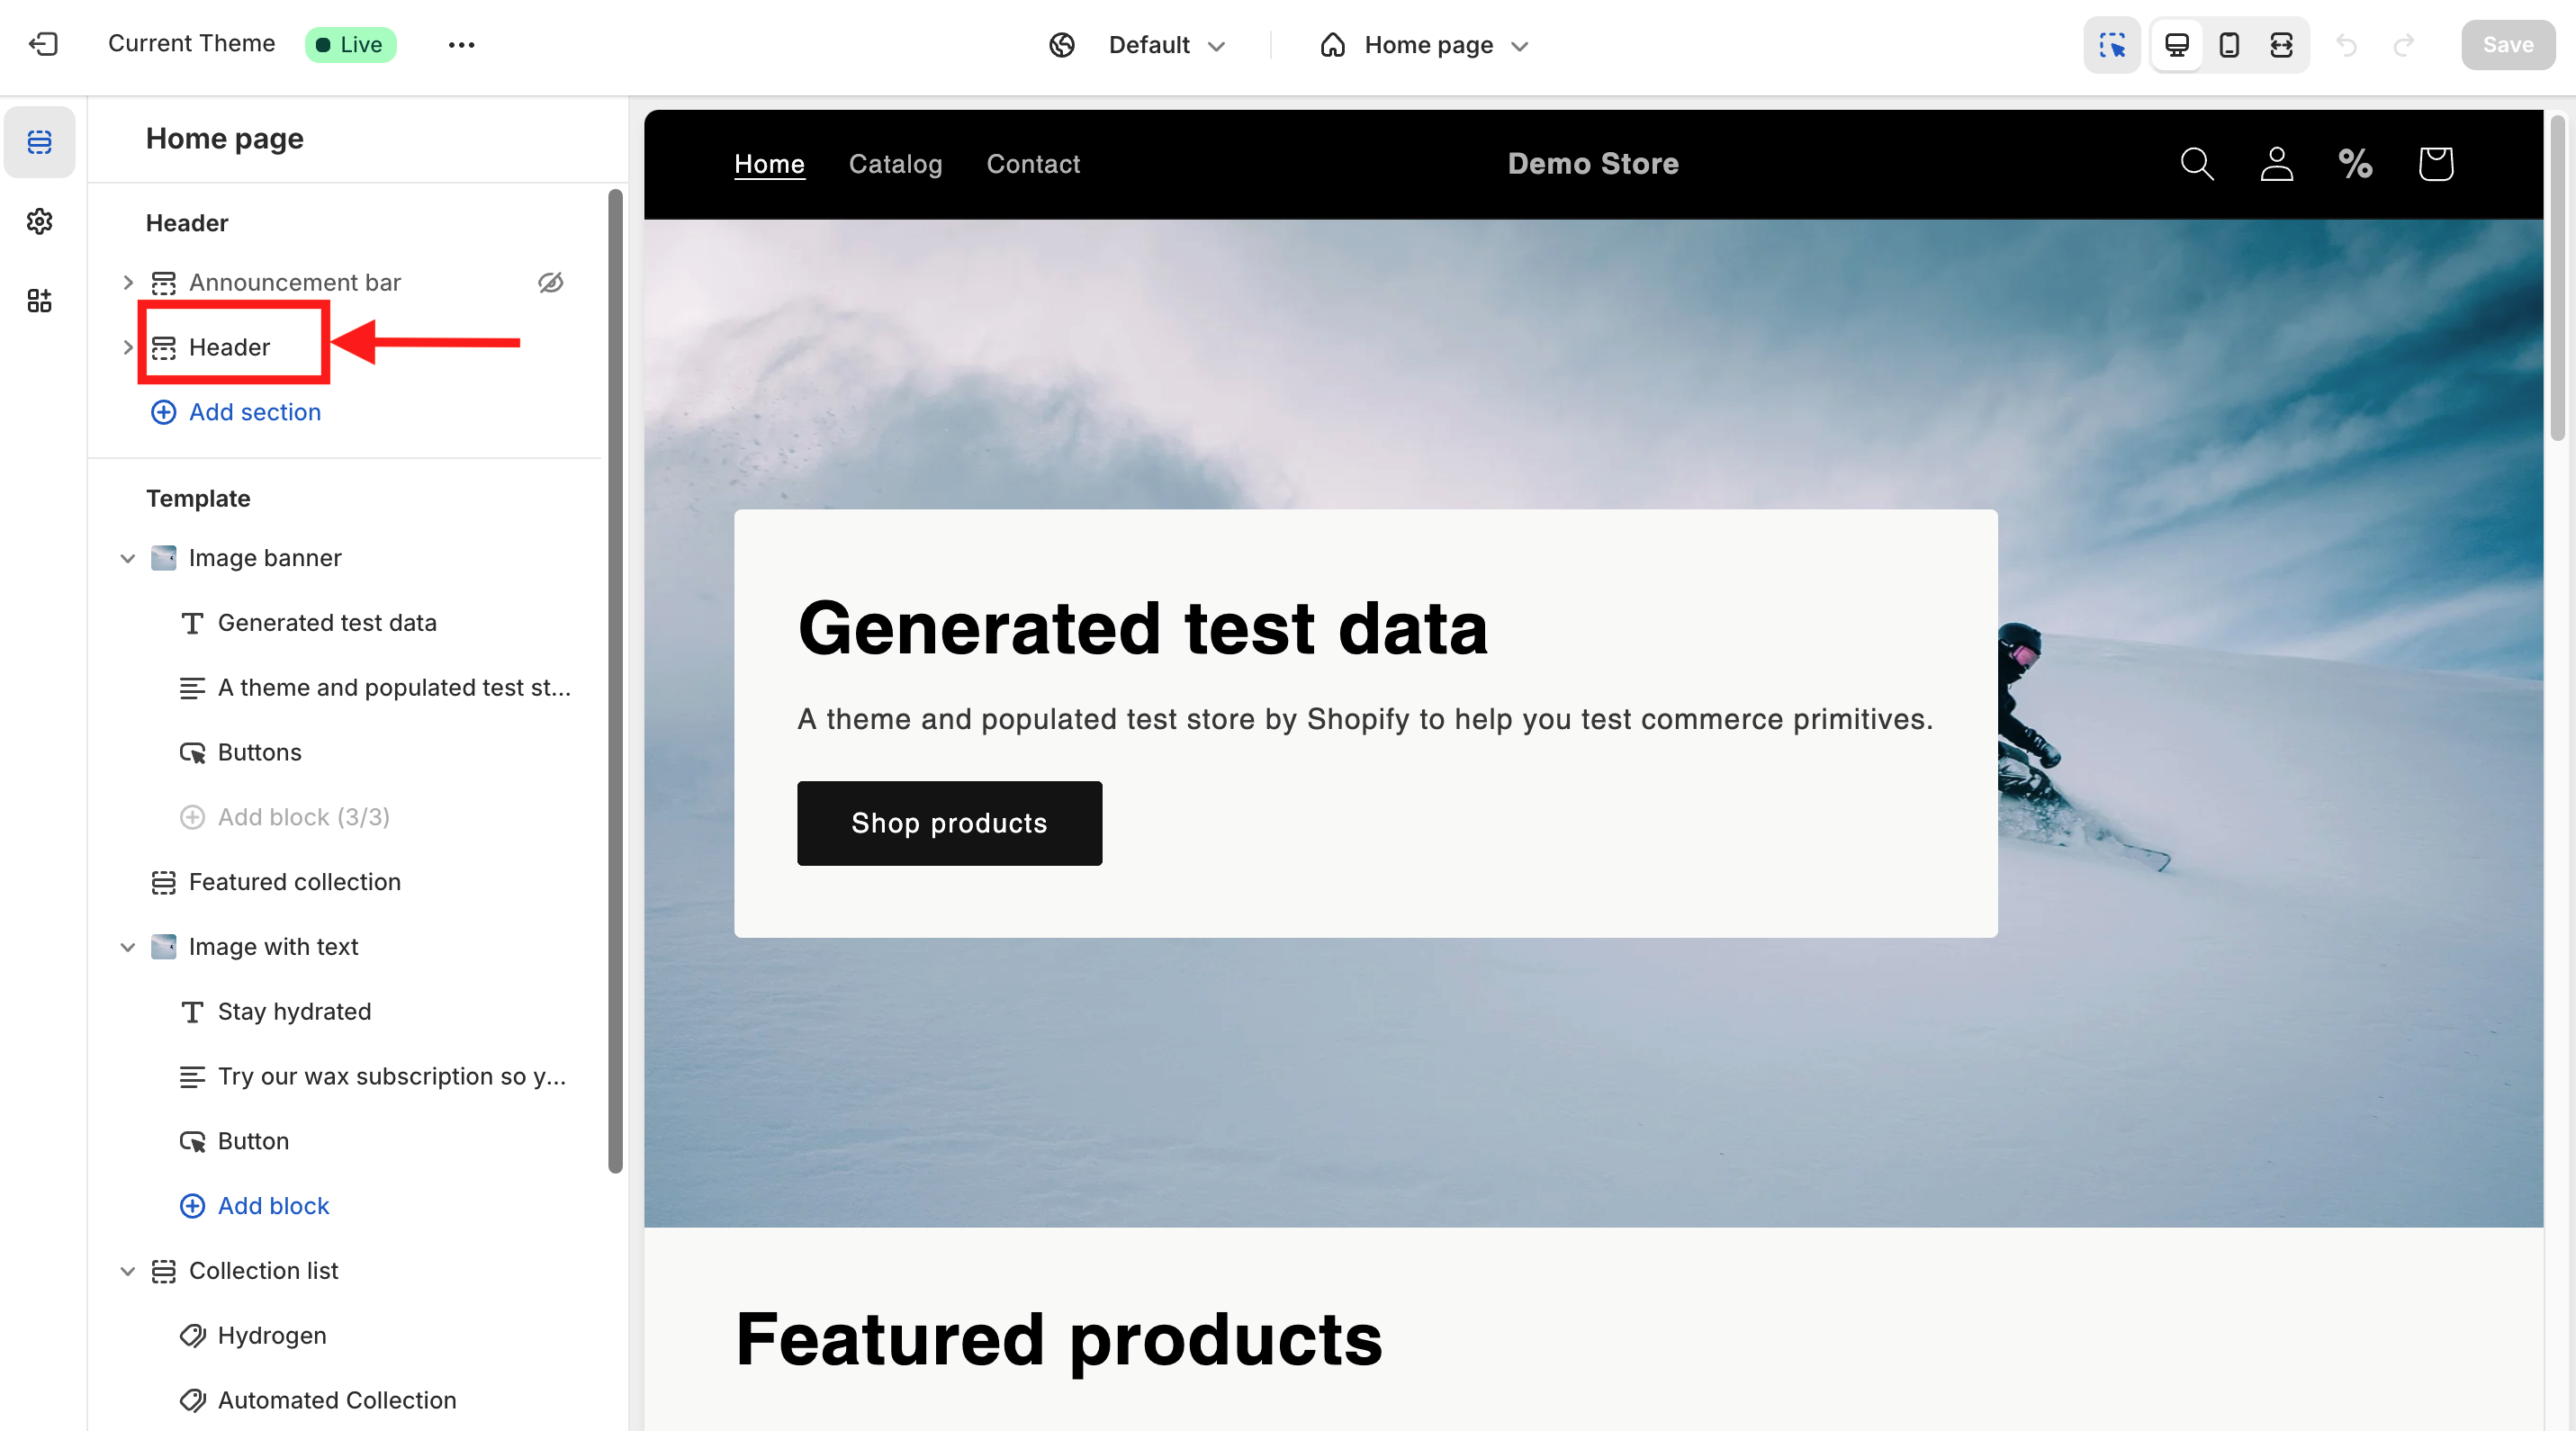
You’ll be taken to the Theme Customization page. From the navigation, select Header.
-
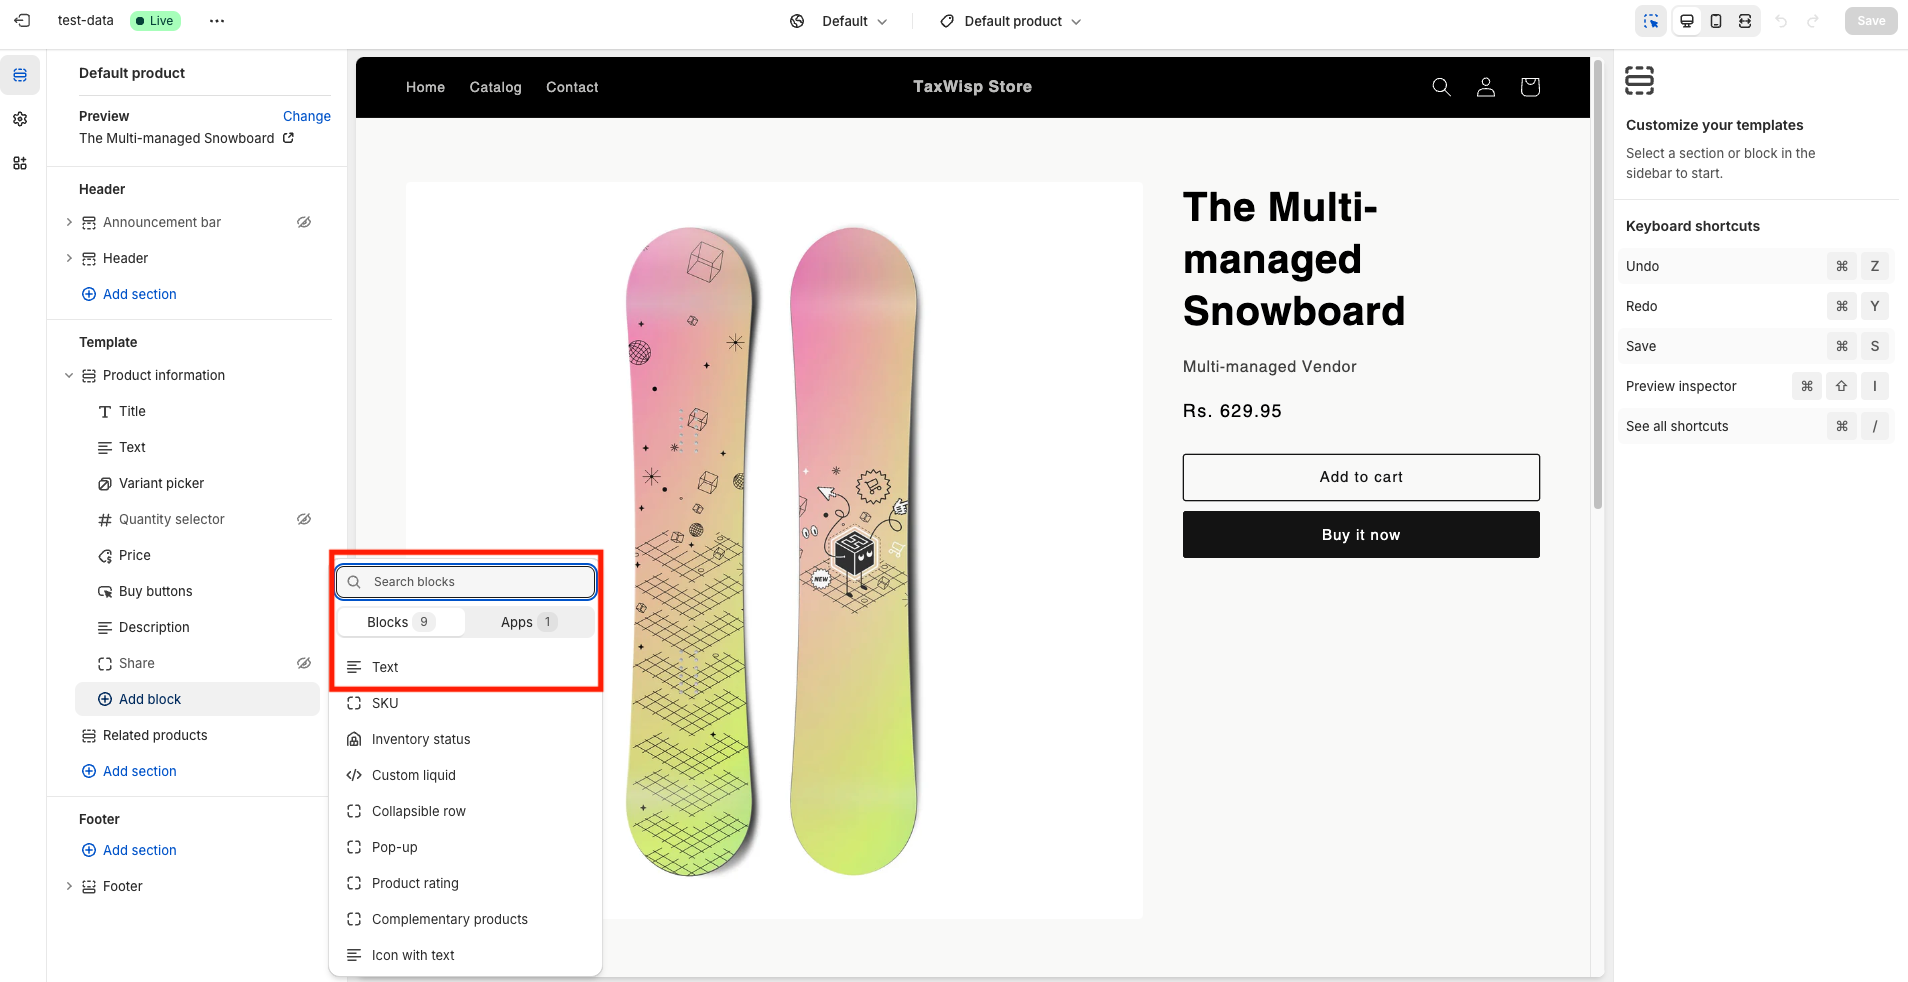
In the Header section, you’ll see an option to Add Block. Click on it.
-
This will open a prompt where you can search for blocks and apps.
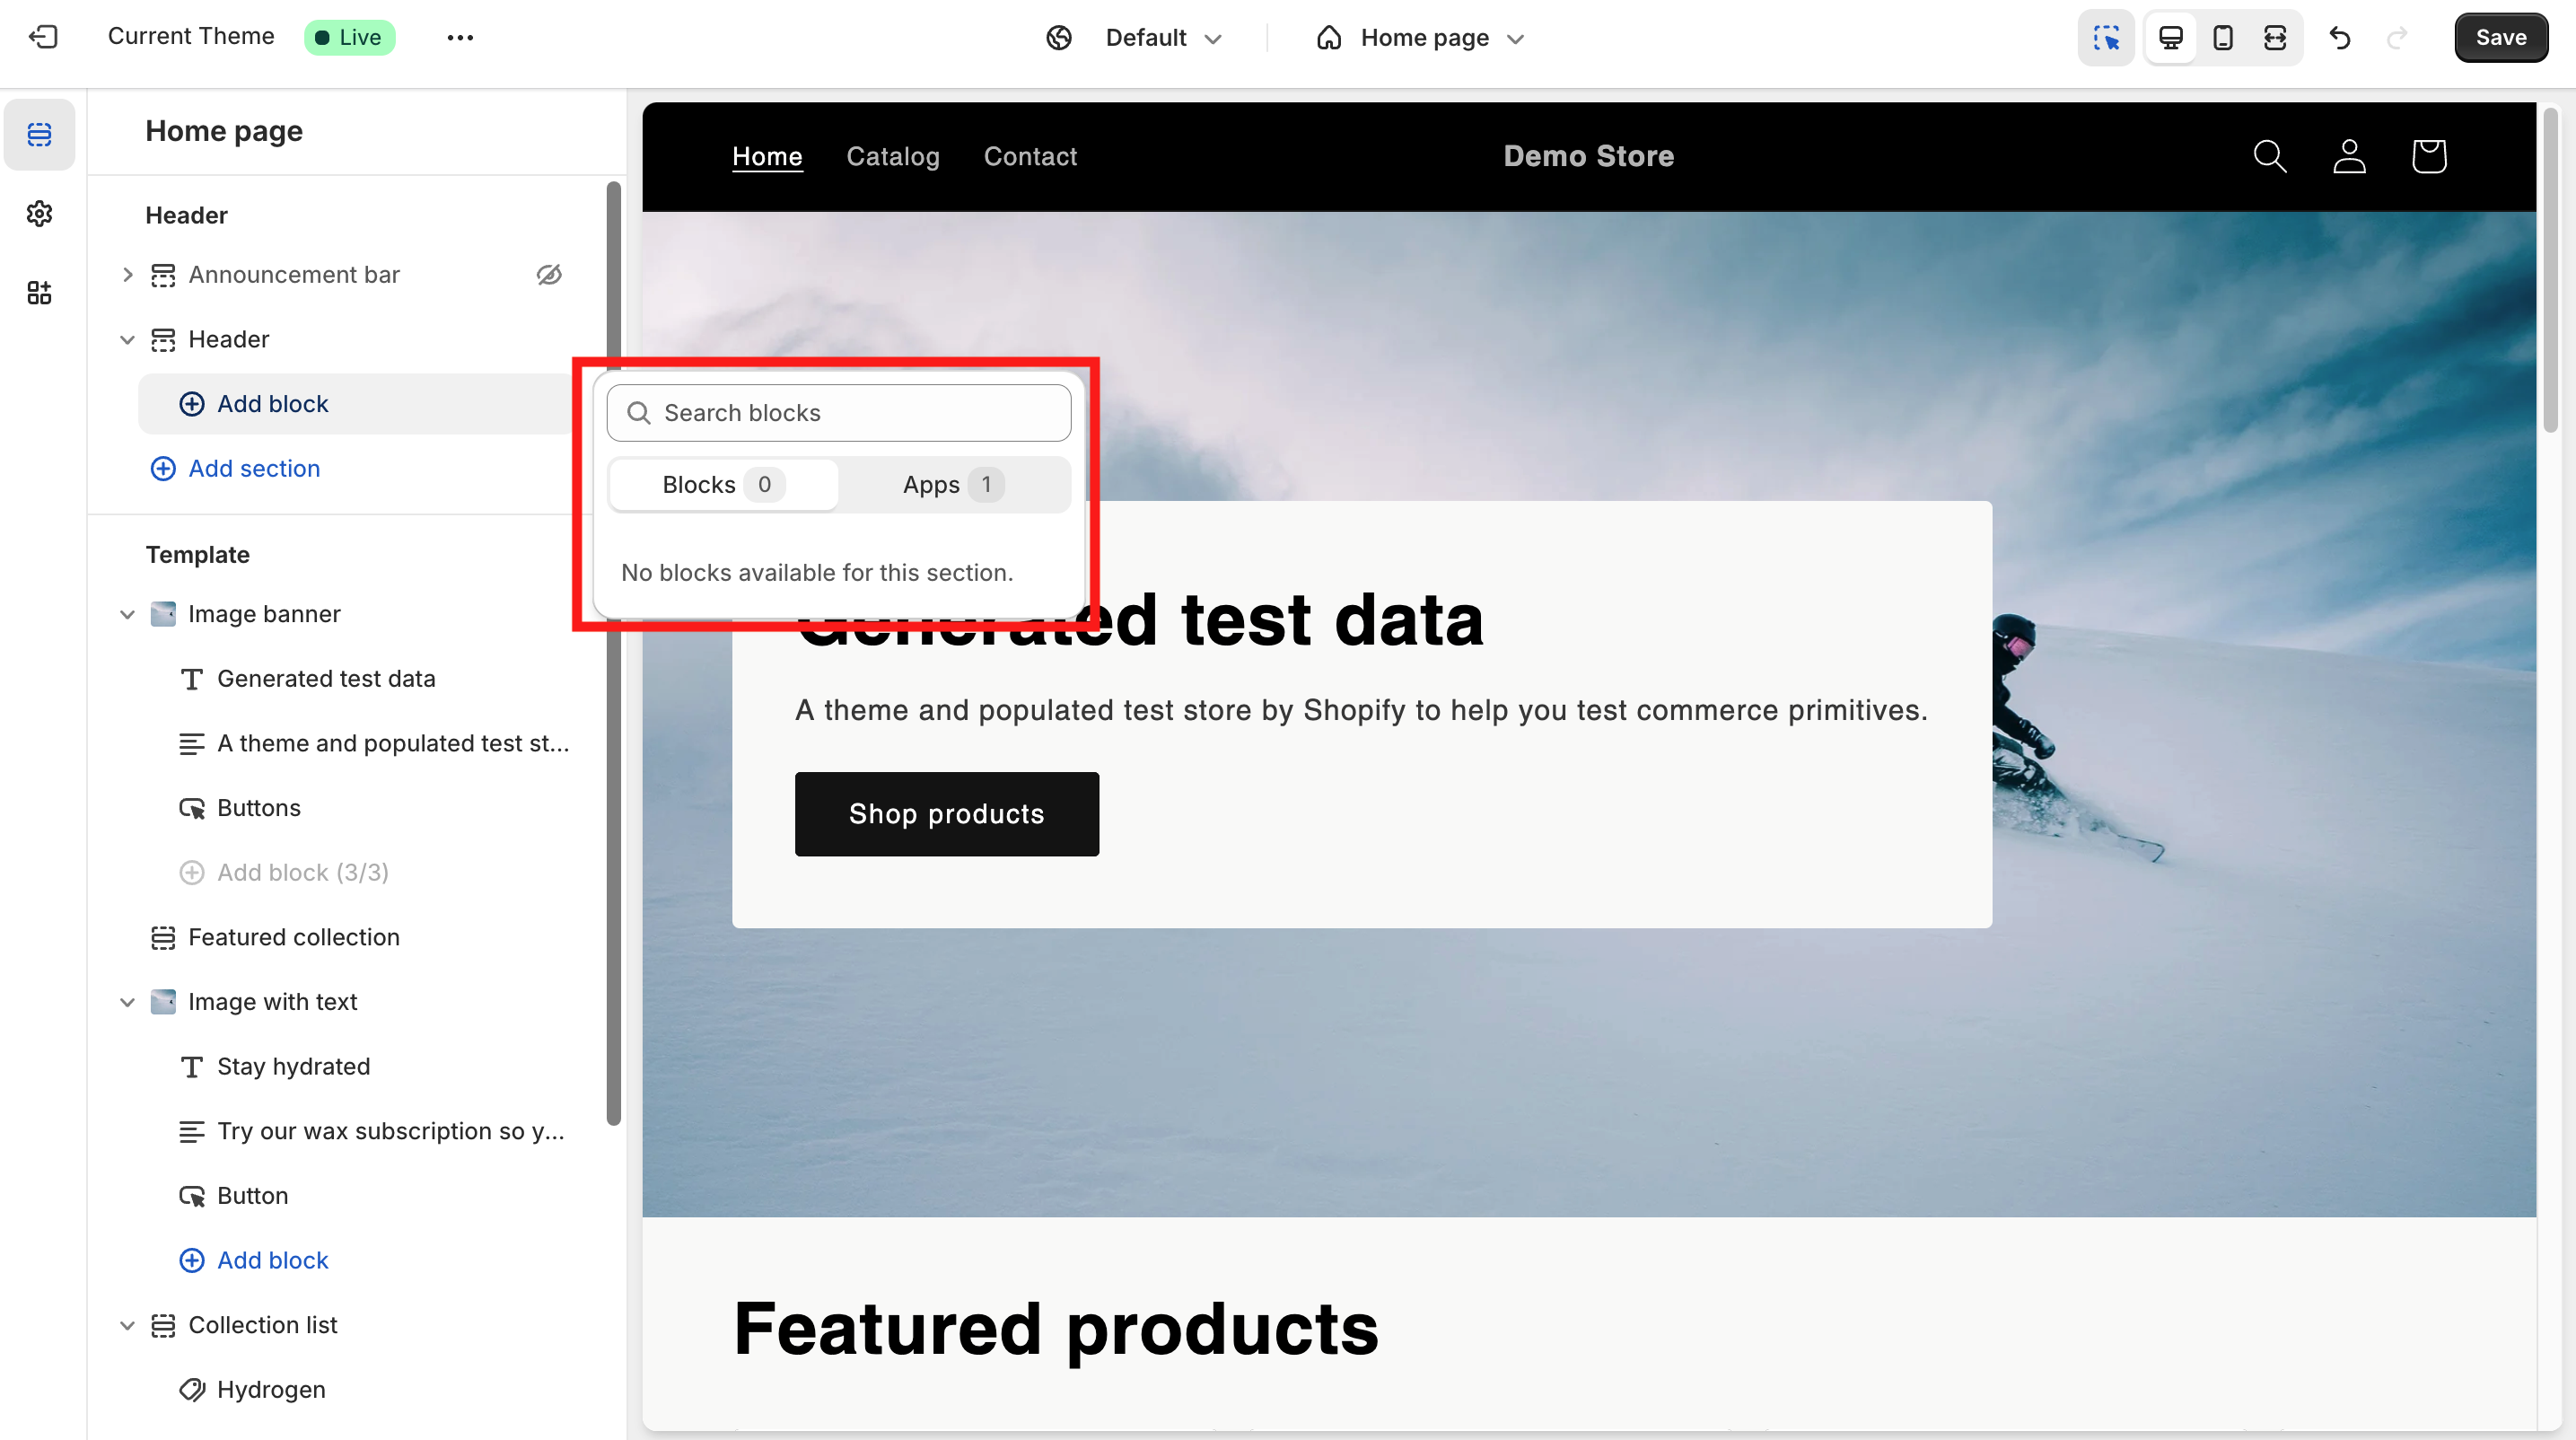
-
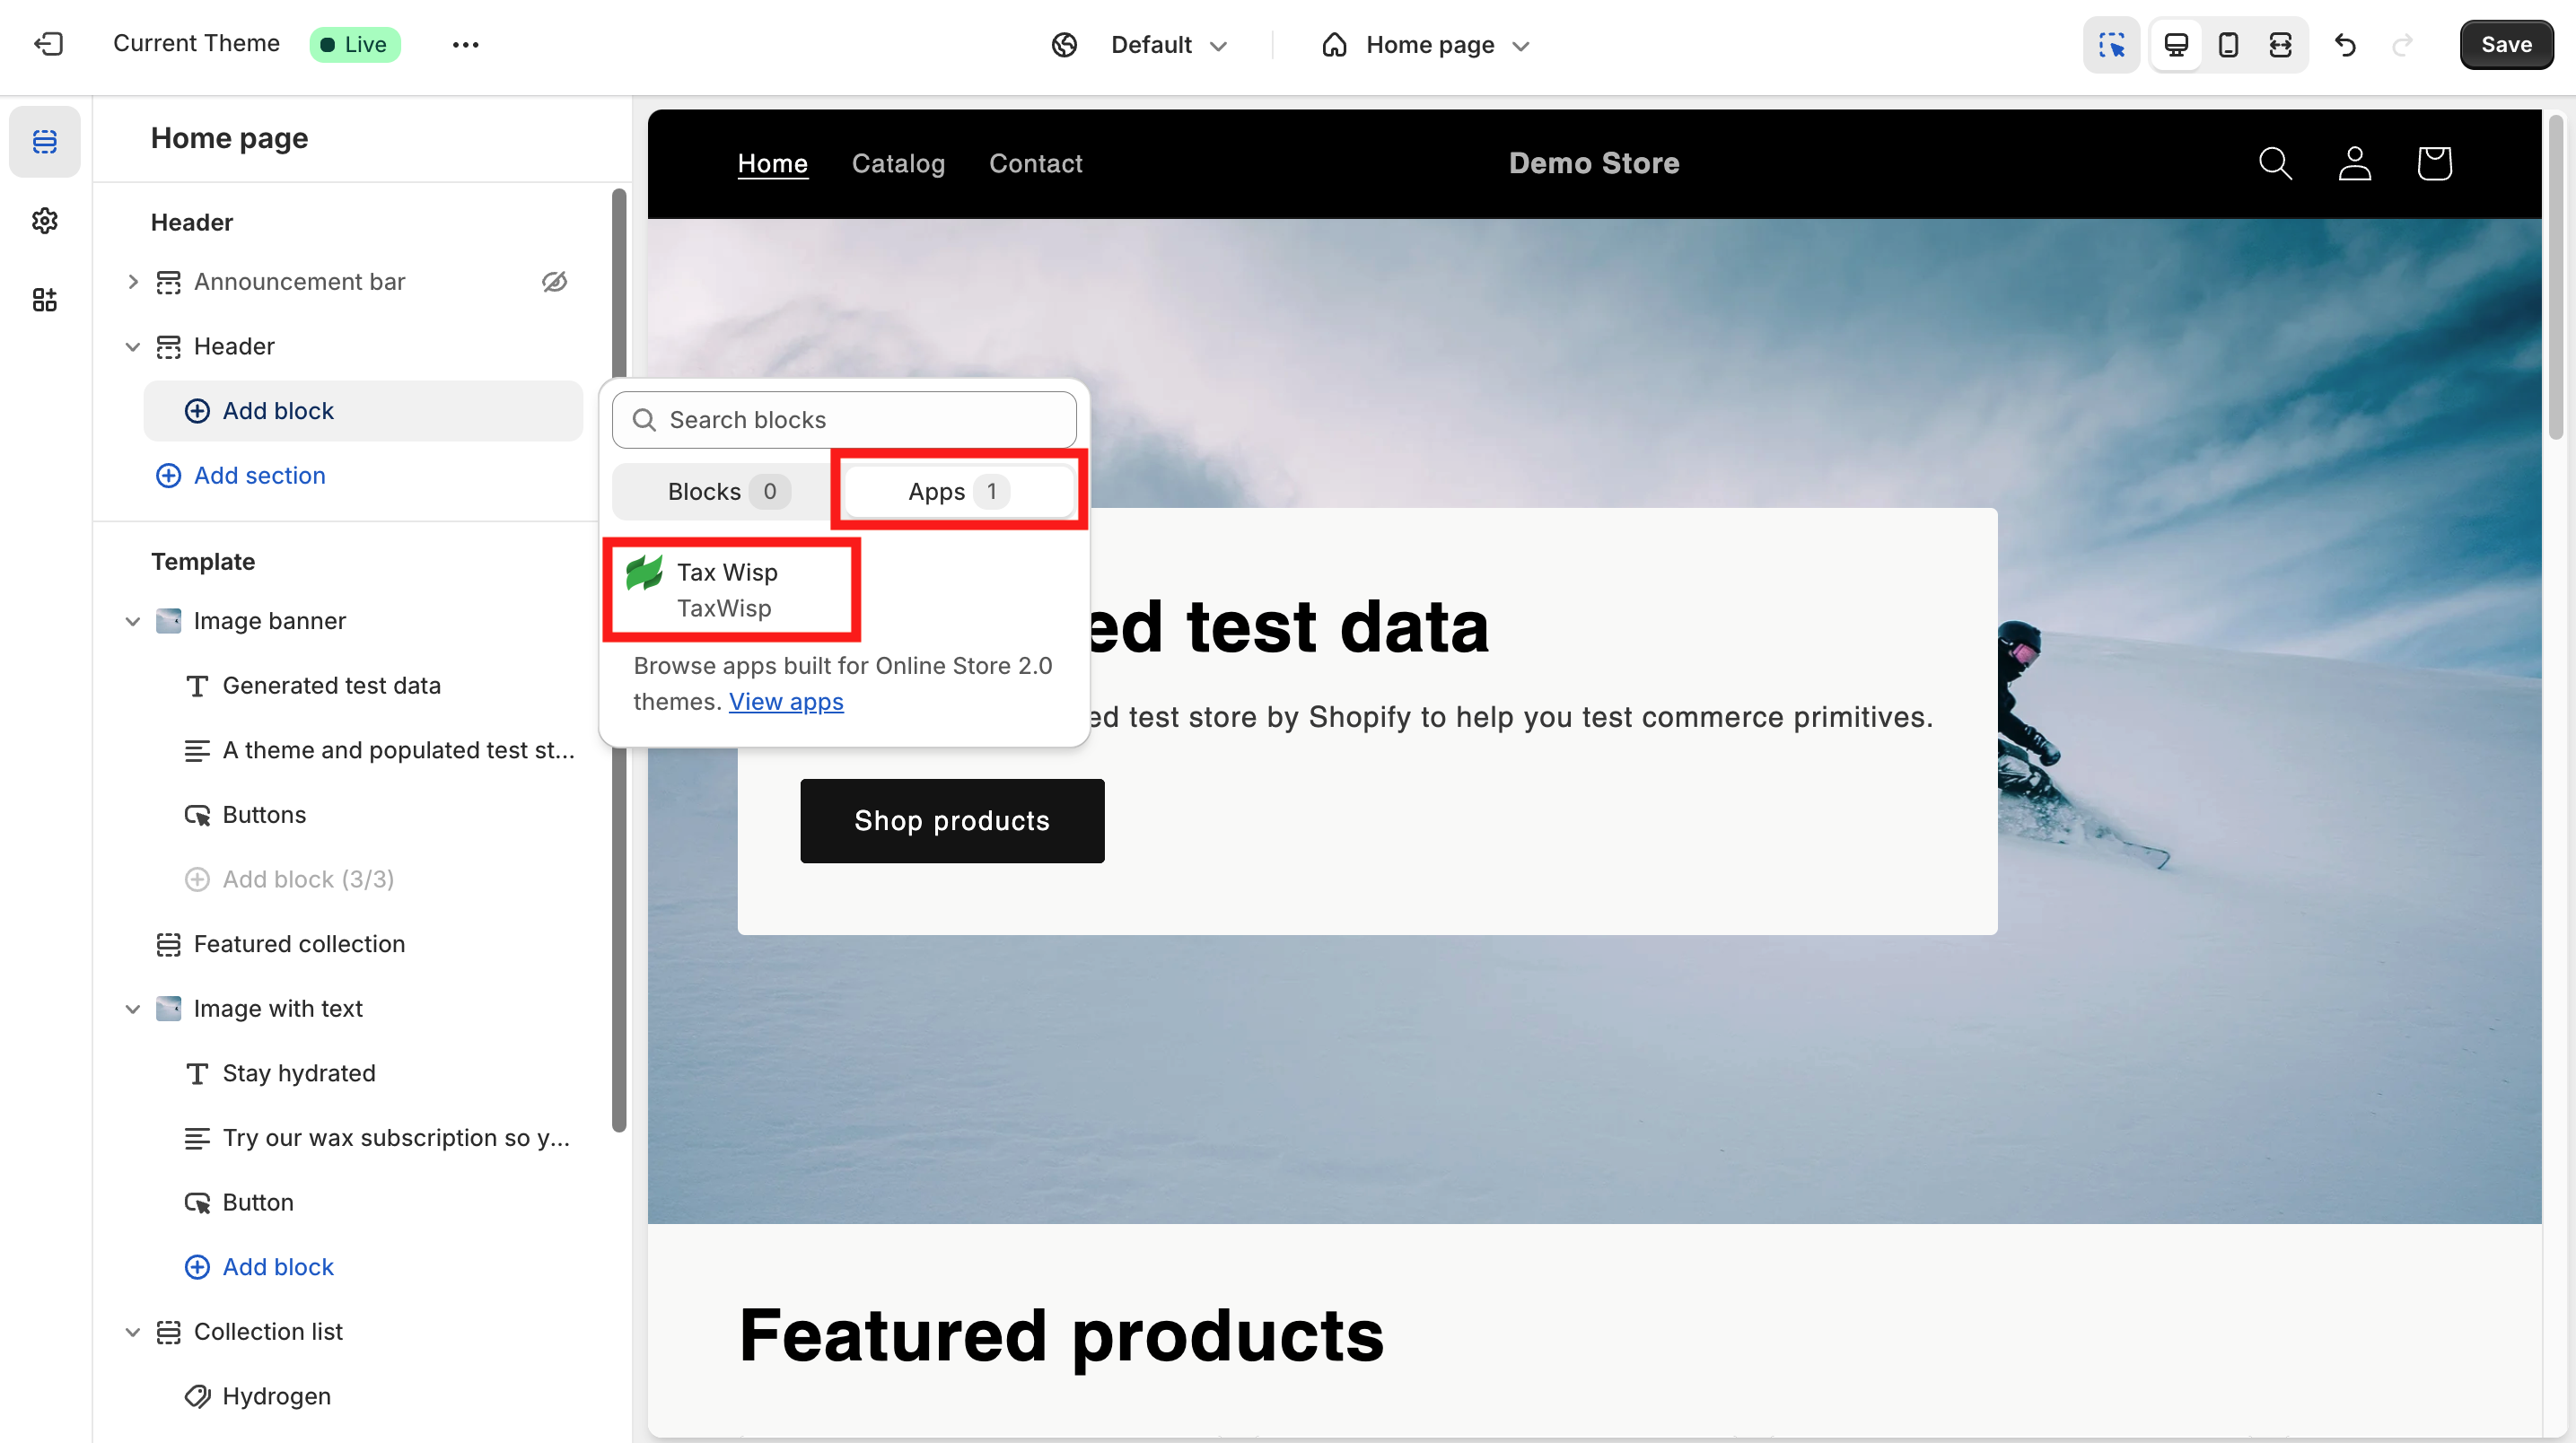
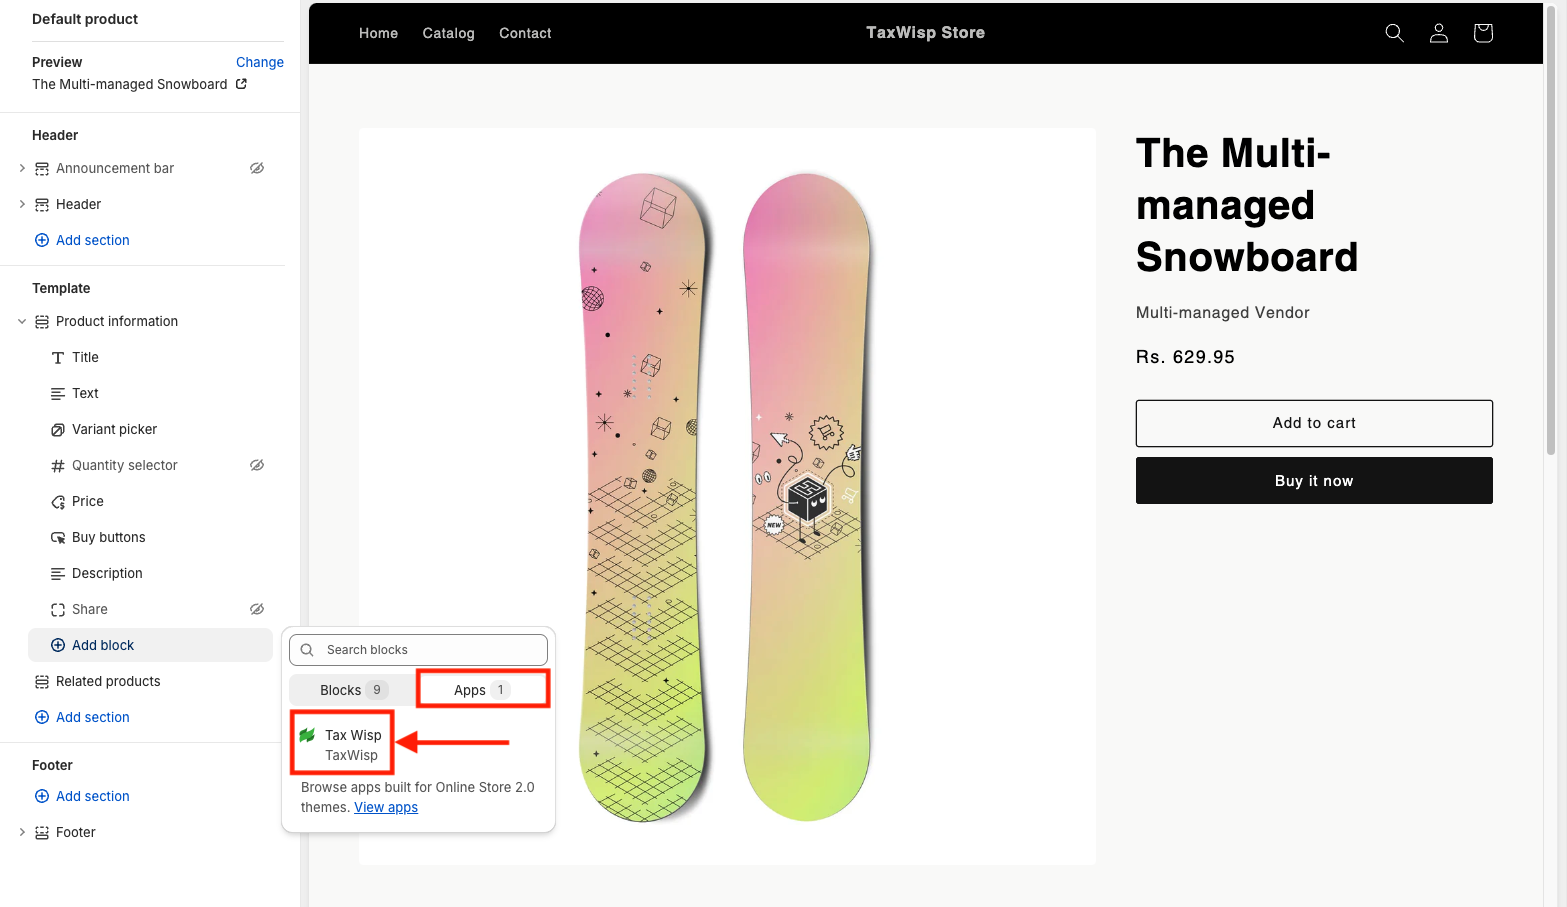
Click on Apps, and you’ll see TaxWisp listed.
-
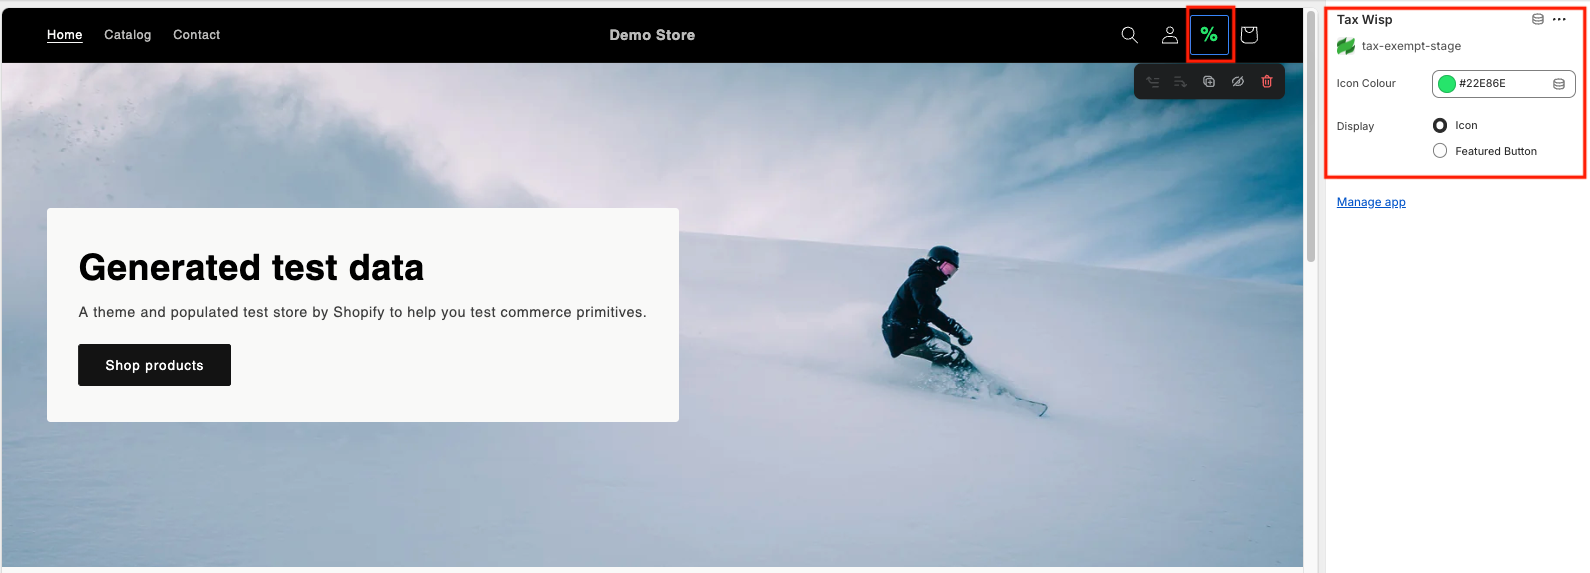
Select TaxWisp to add the app icon to your header. Make sure you select Icon instead of Featured Button for better visibility and accessibility on the header menu. You can change the icon color icon based on your preference.
Don’t forget to click Save. Verify that TaxWisp icon is now listed under the header section.
-
Confirm that the TaxWisp icon (represented by %) has been added to the header navigation of your online store. You should see the % icon alongside other options like Search, Account, and Cart on the right side of the header.
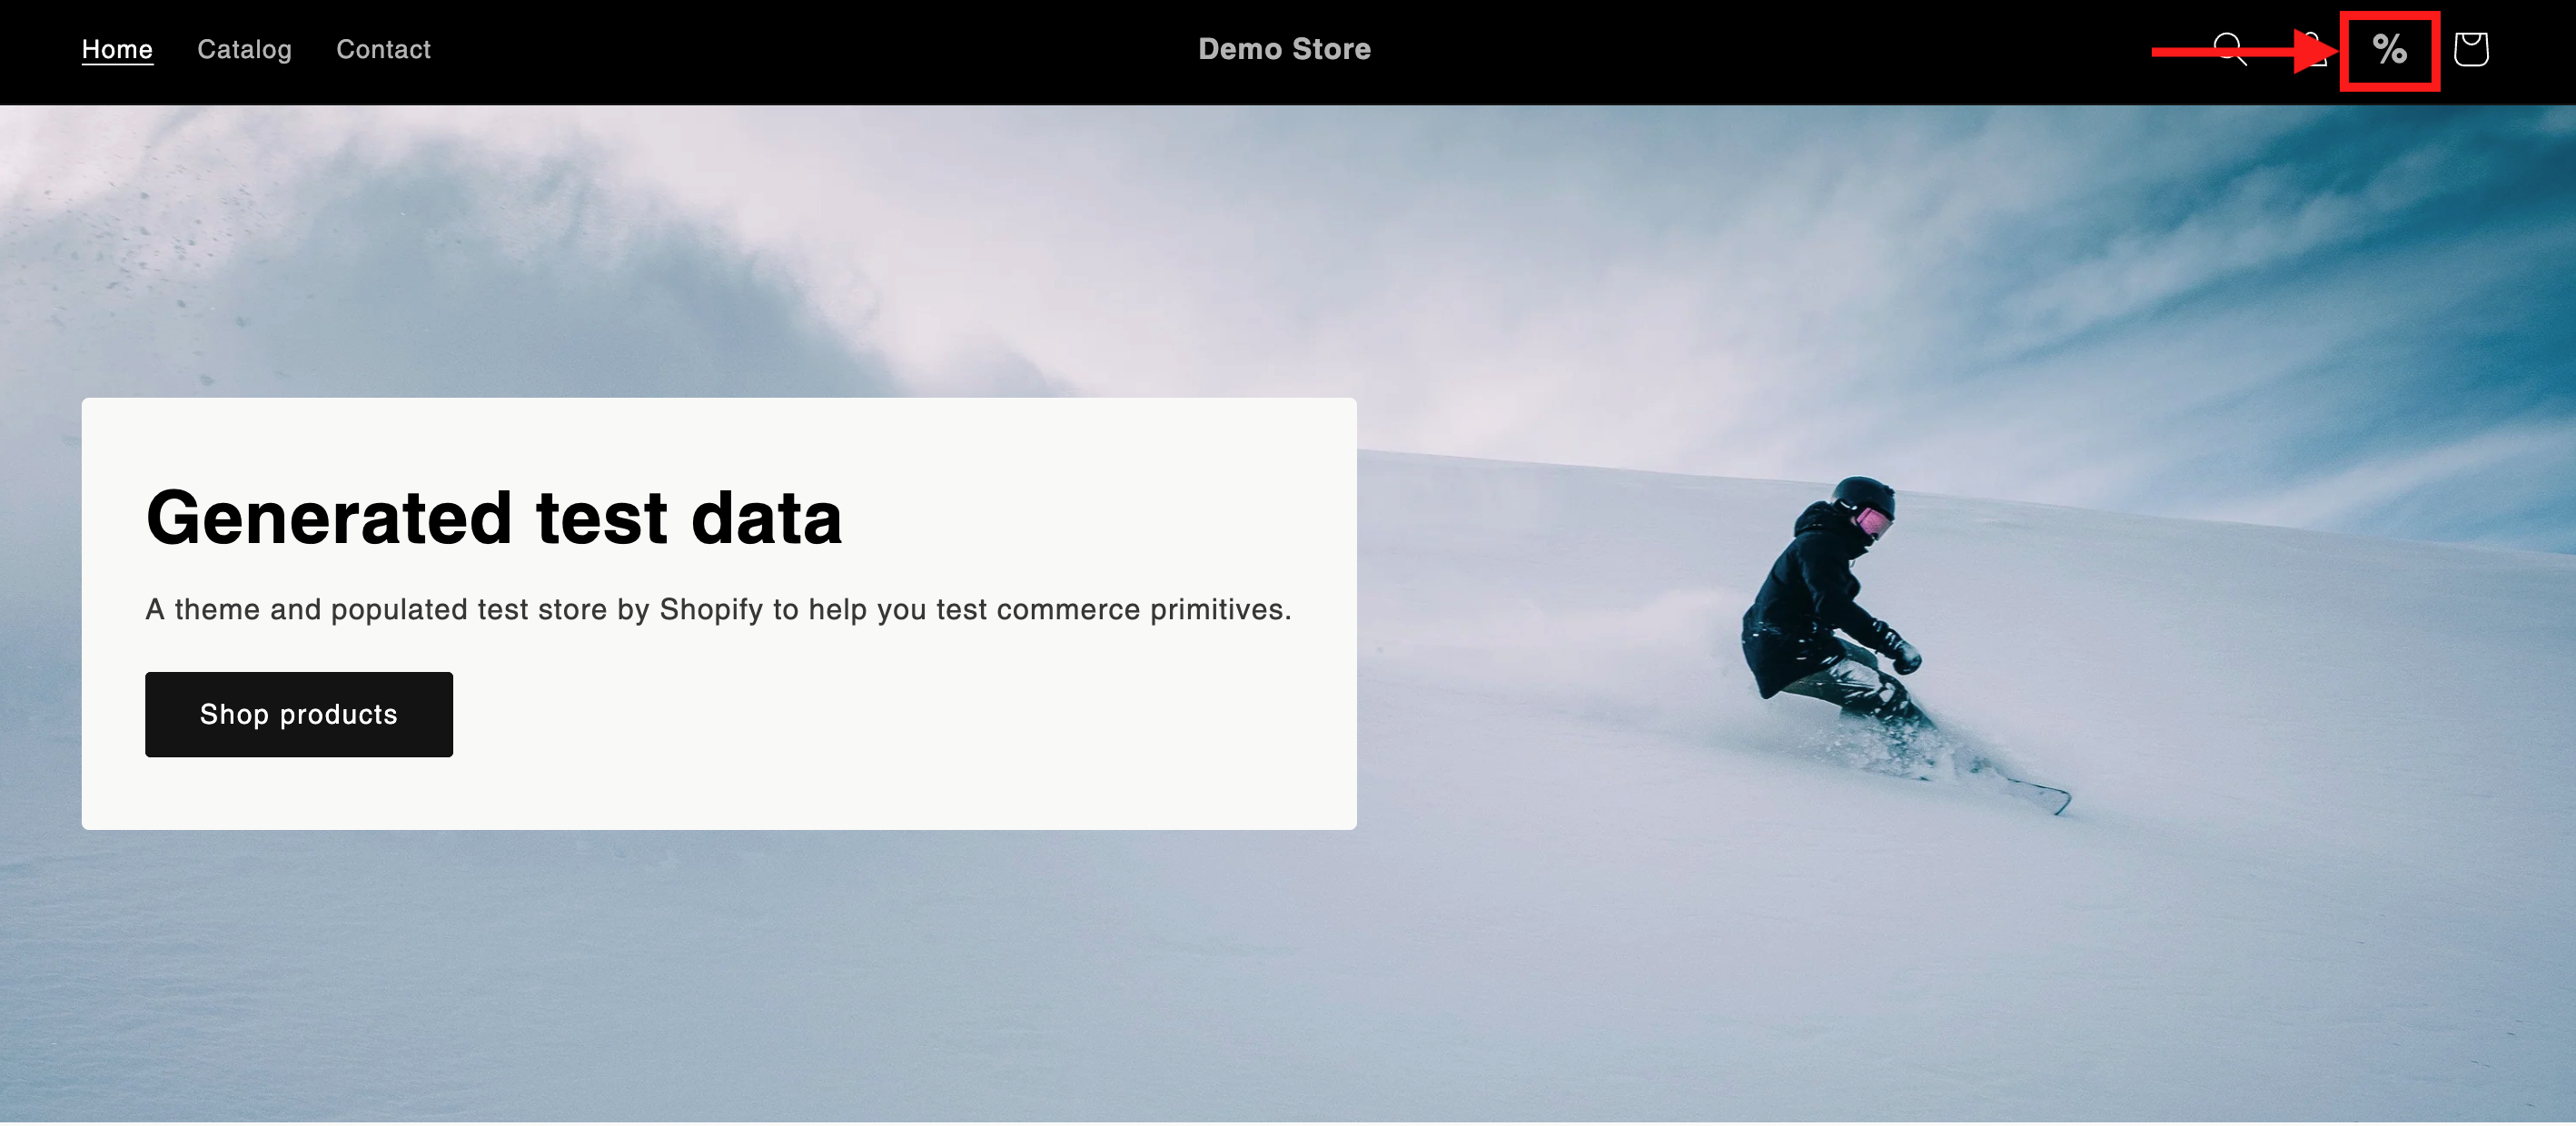
-
If the % icon does not appear in the header, you may have missed a step. In that case, repeat the process carefully to ensure that the TaxWisp app icon (%) is successfully added, allowing customers to interact with the app and begin the tax exemption process.
Step 6: Adding TaxWisp Extension on Product Pages
Adding the TaxWisp Product Page Extension enables customers to apply for tax exemptions directly from each product page, providing a smoother experience. While the TaxWisp extension can be placed on any page or section of your online store, adding it to the product page ensures better visibility and accessibility for customers. Follow these steps to set it up:
-
In your Shopify Admin, navigate to Online Store under Sales Channels, then click on Themes and select Customize.
-
On the Theme Customization page, select the Product Page from the dropdown, the Home Page is selected by default.
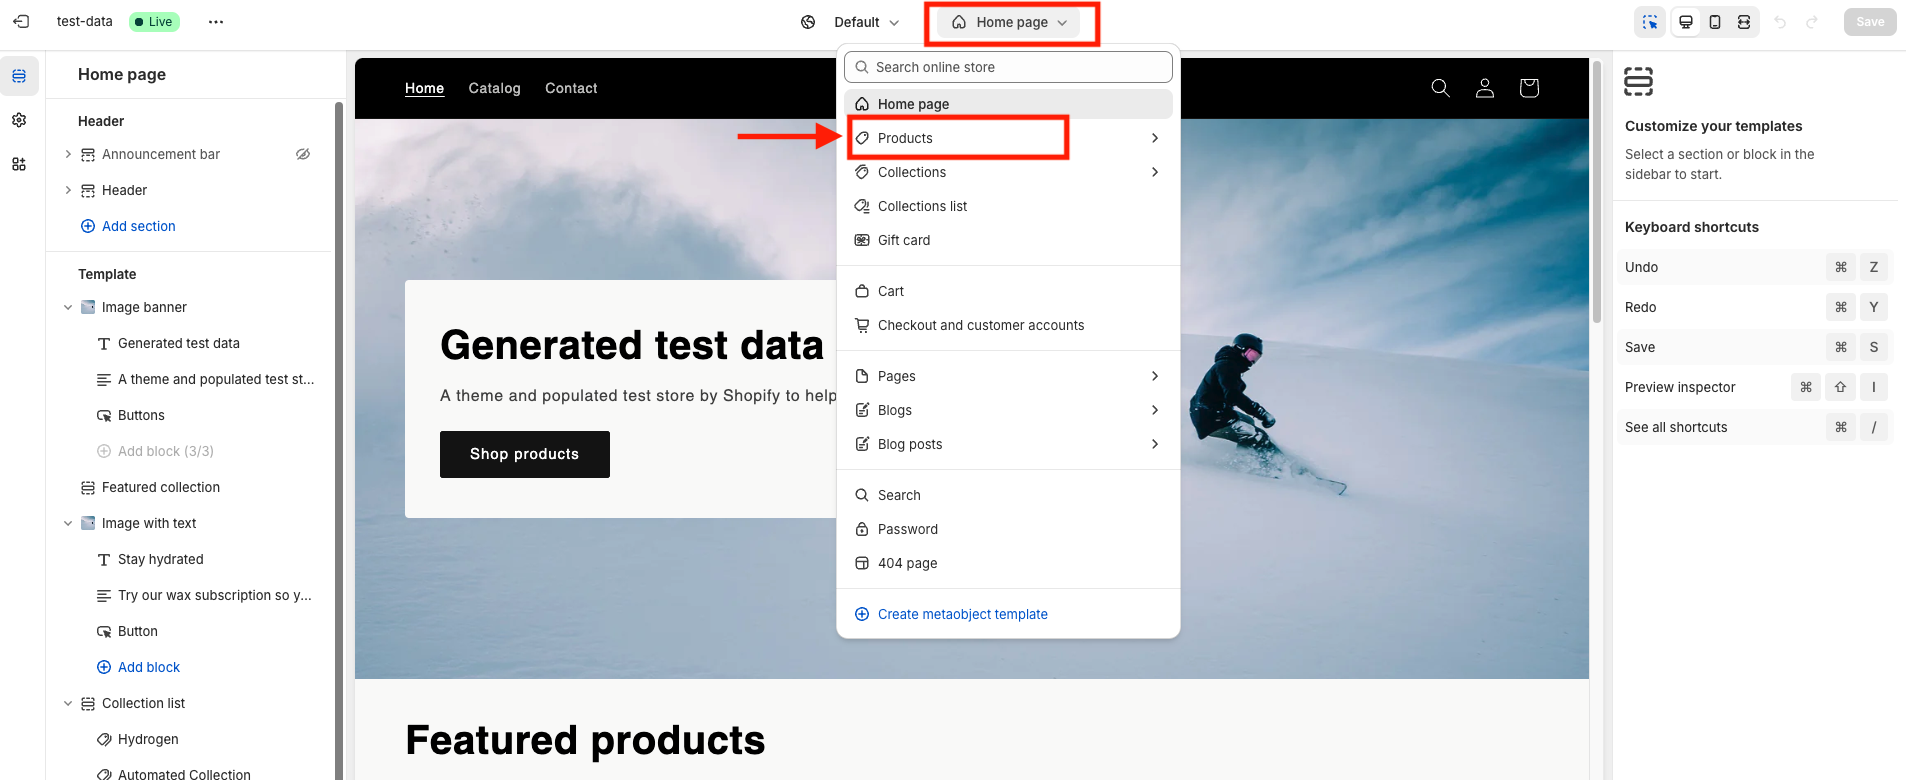
-
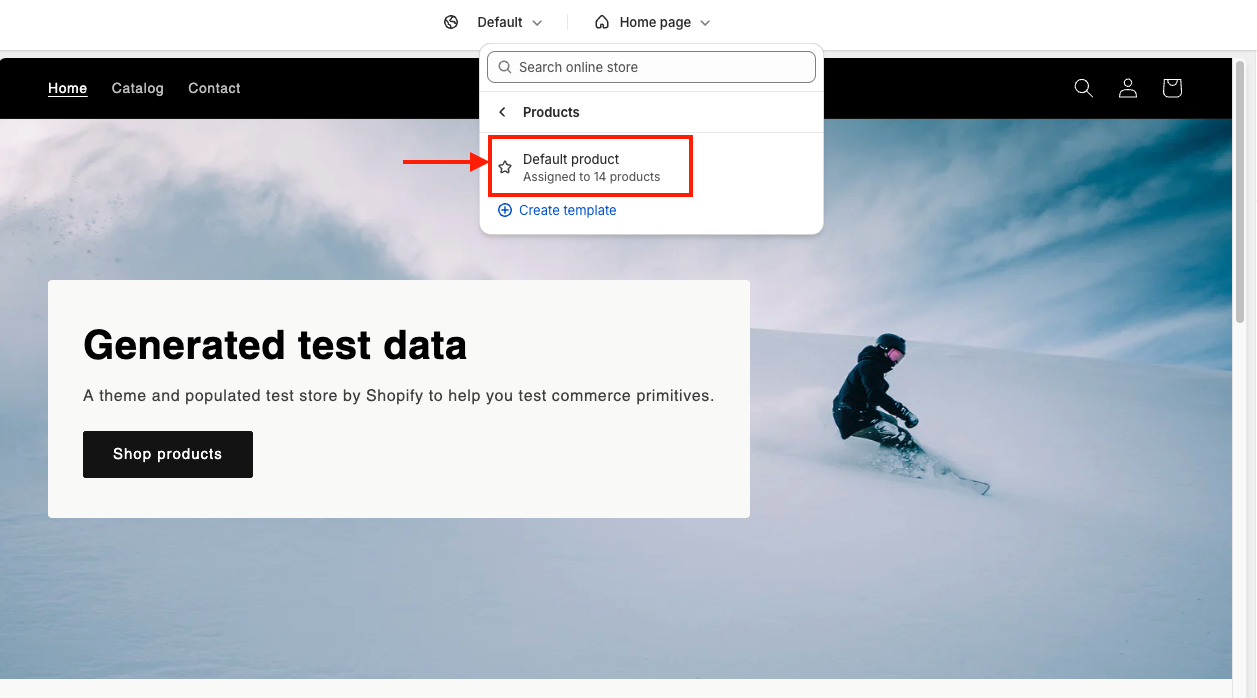
After selecting the Product Page, choose Default Product to apply the extension across all products.
 tip
tipIf your Shopify store uses a custom theme, the product page may have a different name instead of "Default Product." In such cases, locate and select the appropriate product page in your theme to ensure that the TaxWisp extension is correctly applied to your store’s product pages.
-
Under the Product Information section on the left navigation, click on Add Block.
-
This will open a prompt where you can search for blocks and apps.
-
Click on Apps, and you’ll see TaxWisp listed.
-
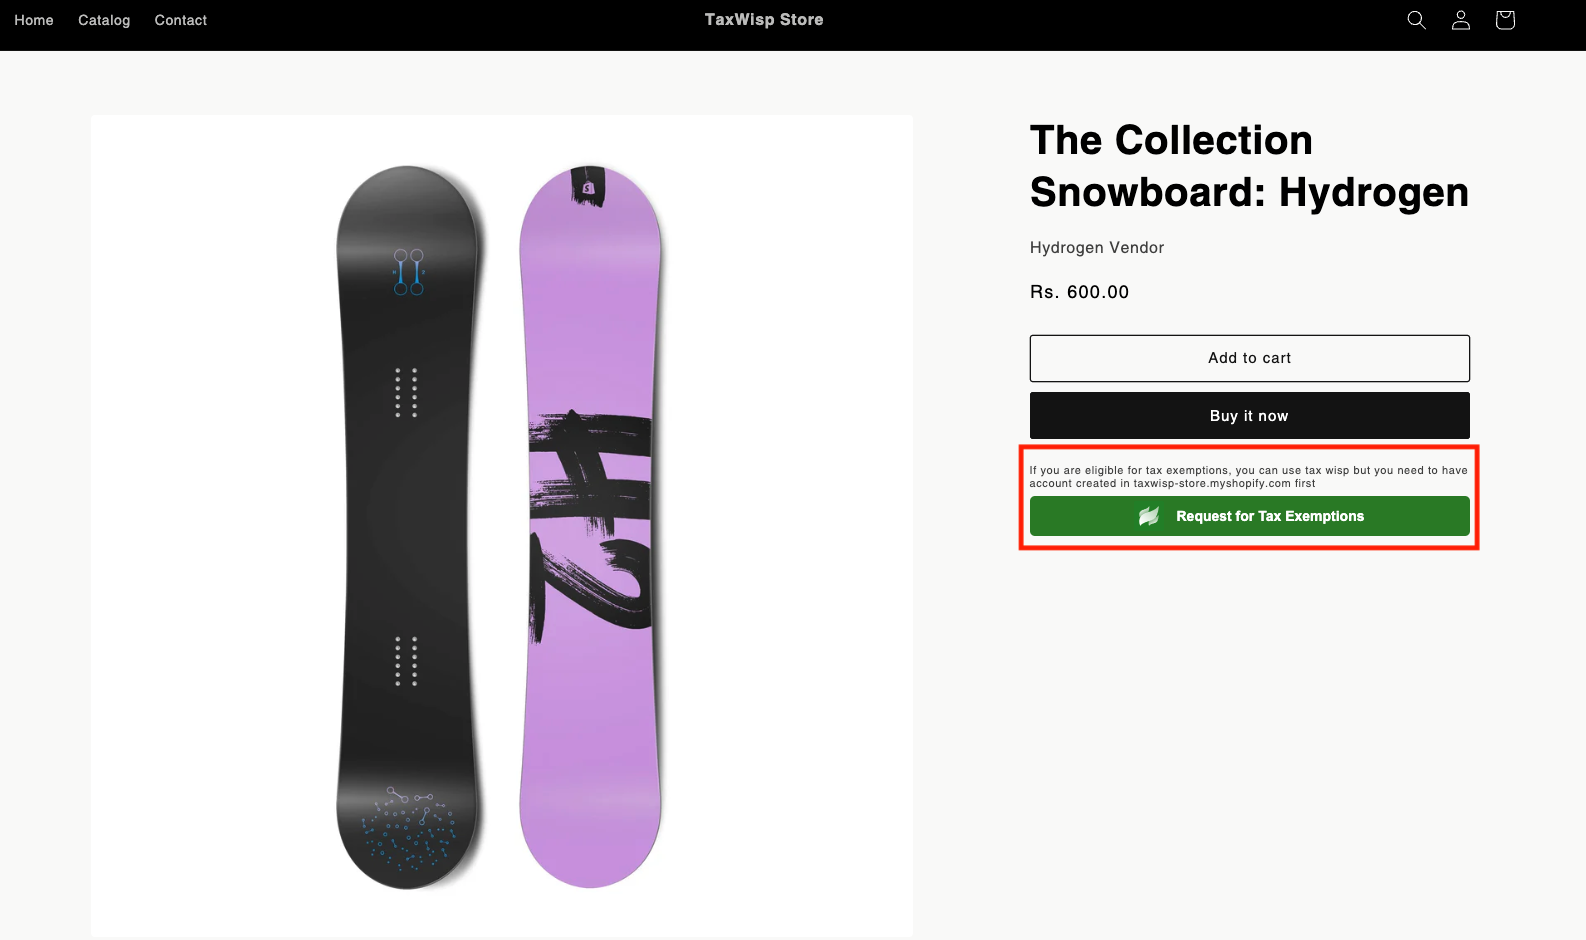
Select TaxWisp to add it to your product page layout. Ensure that it has been added to the product page, a % icon will appear on the product page.
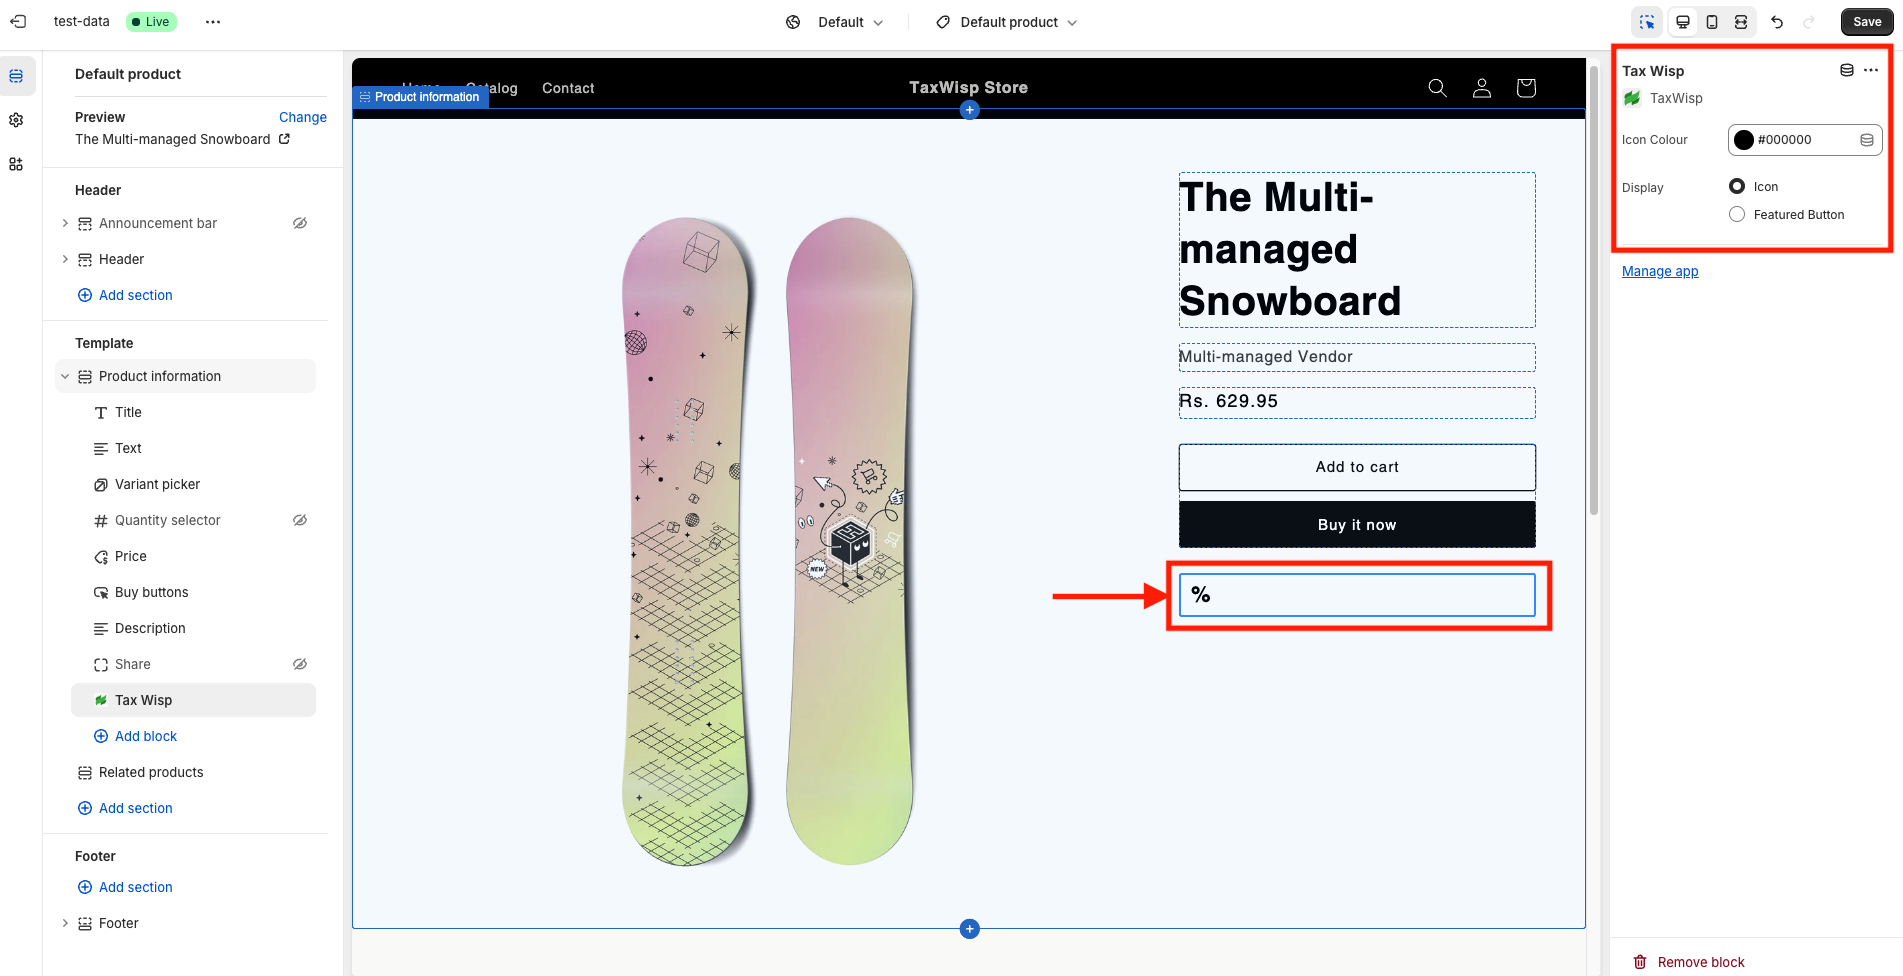
-
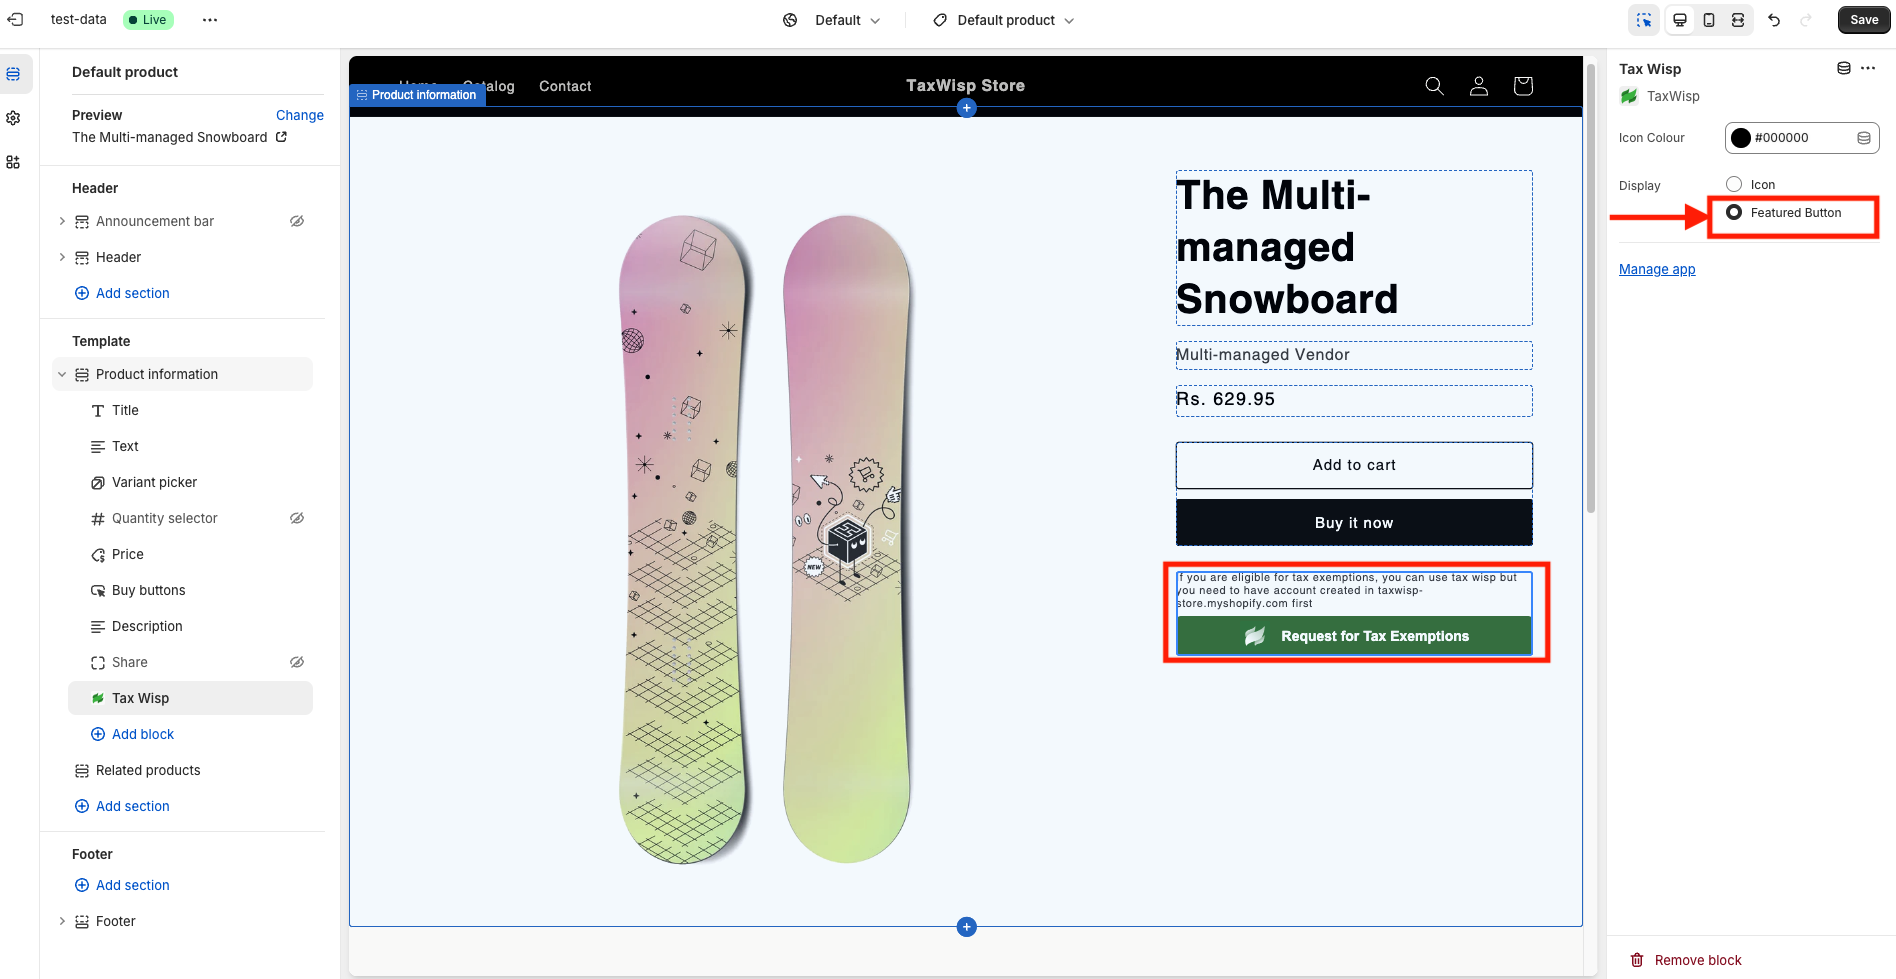
Upon adding TaxWisp to the product page, by default the Icon (% icon) will be selected. Change it to Featured Button. Confirm that the icon extension has changed to the button extension. Ensure it’s visible where customers can easily spot it, and click Save to confirm.
-
Verify that the Request for Tax Exemption option now appears on your product pages. This feature allows customers to see the exemption status and apply for tax exemption directly while viewing a product.
-
If the Request for Tax Exemption option isn’t displaying as expected, revisit the setup steps to ensure everything is properly configured.
Step 7: Adding TaxWisp Text-Based Extension to Your Store Footer
In addition to the TaxWisp icon in the header and the product page extension, you can also add a simple text link to your store footer. This provides customers with another way to access the tax exemption request flow and is especially useful for stores that want a clean, minimal look.
To add the text link:
-
In your Shopify Admin, navigate to Online Store under Sales Channels, then click on Themes and select Customize.
-
You’ll be taken to the Theme Customization page. From the navigation, select Footer.
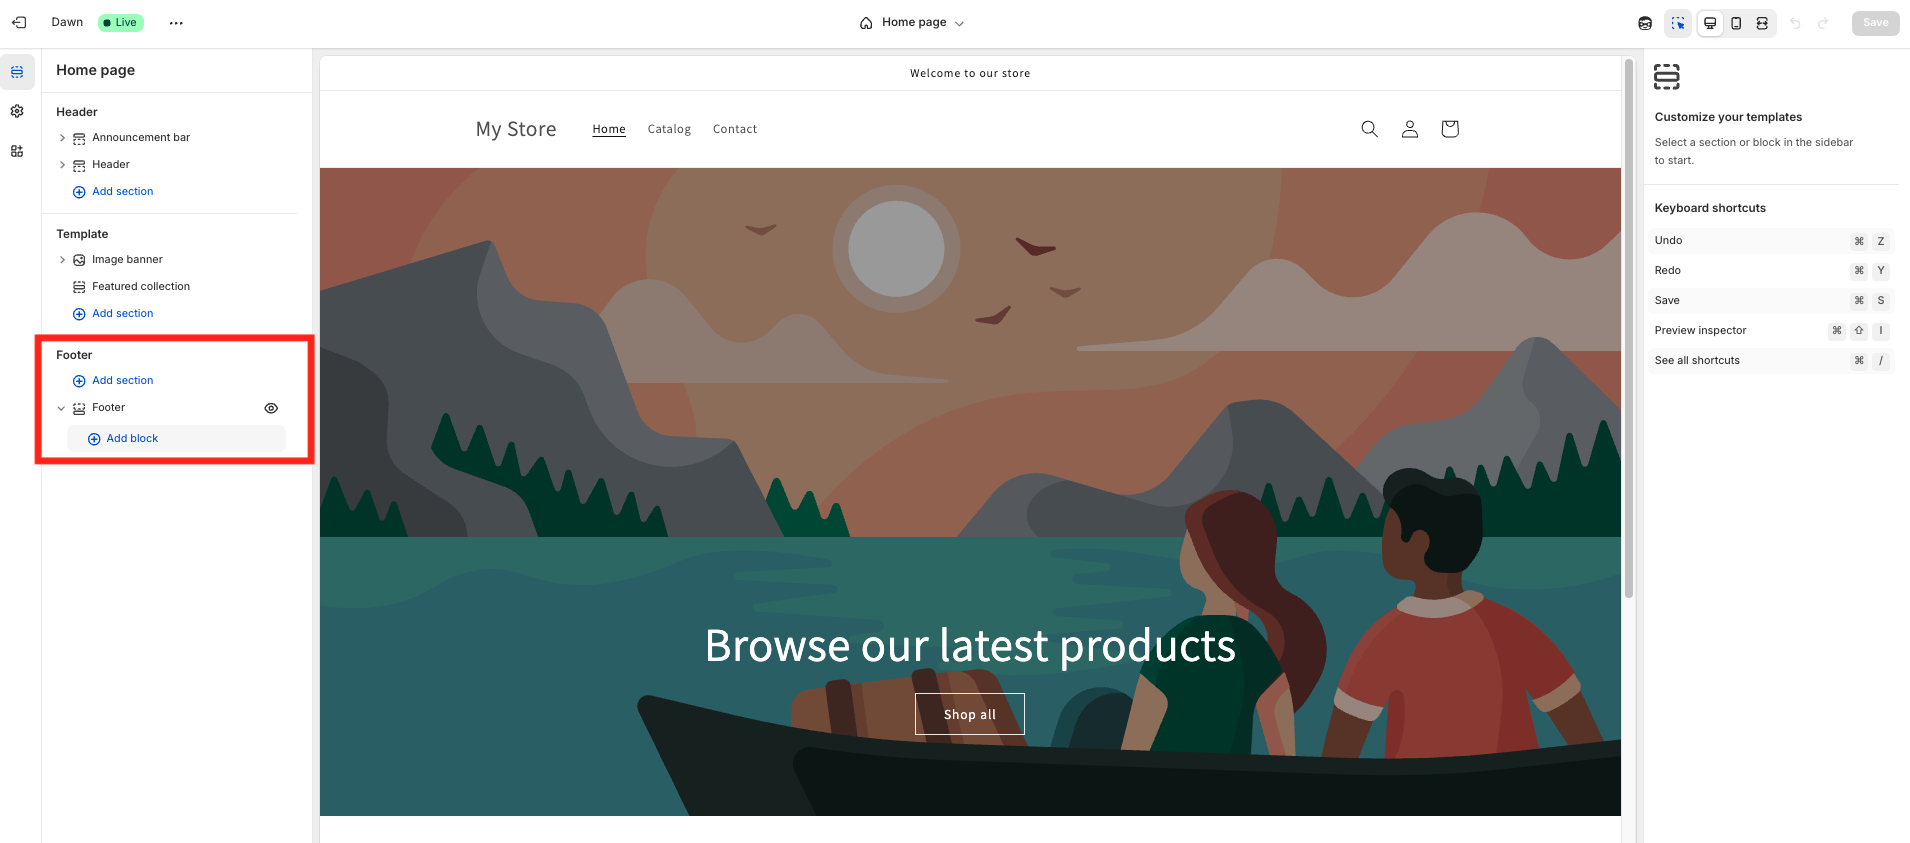
-
In the Footer section, you’ll see an option to Add Block. Click on it. This will open a prompt where you can search for blocks and apps.Click on Apps, and you’ll see TaxWisp listed.

-
Select TaxWisp to add the app extension to the footer.

-
Make sure you select Text instead of Icon or Featured Button for better visibility and accessibility on the footer menu. You can change the text color based on your preference.
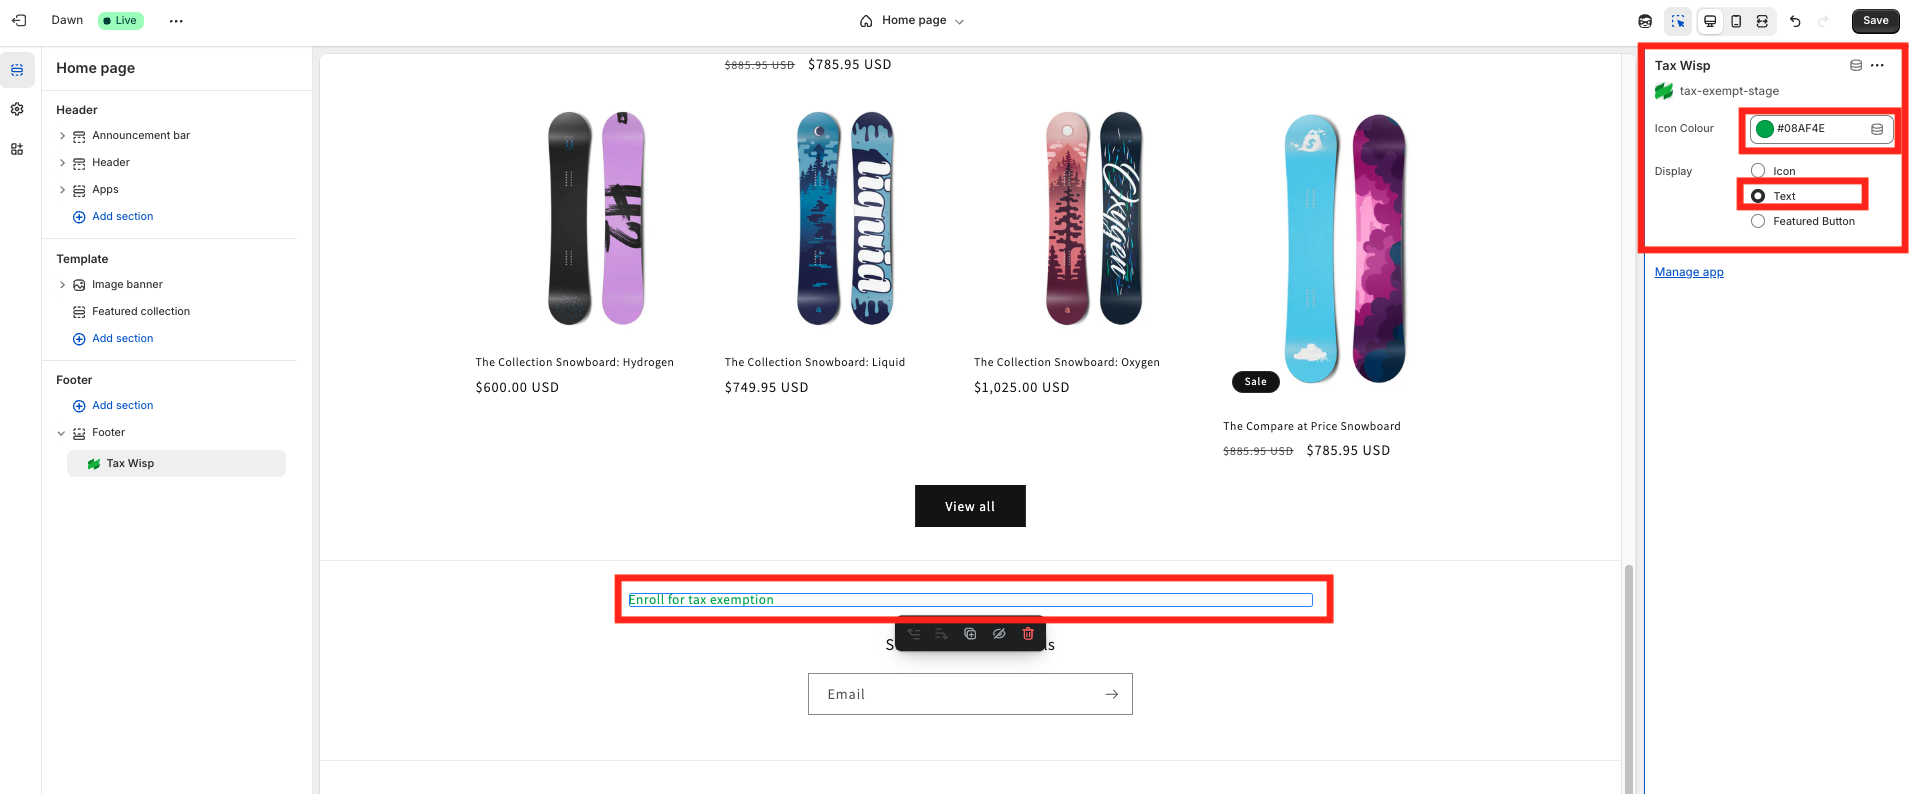
Don’t forget to click Save. Verify that TaxWisp text extension is now listed under the footer section.
-
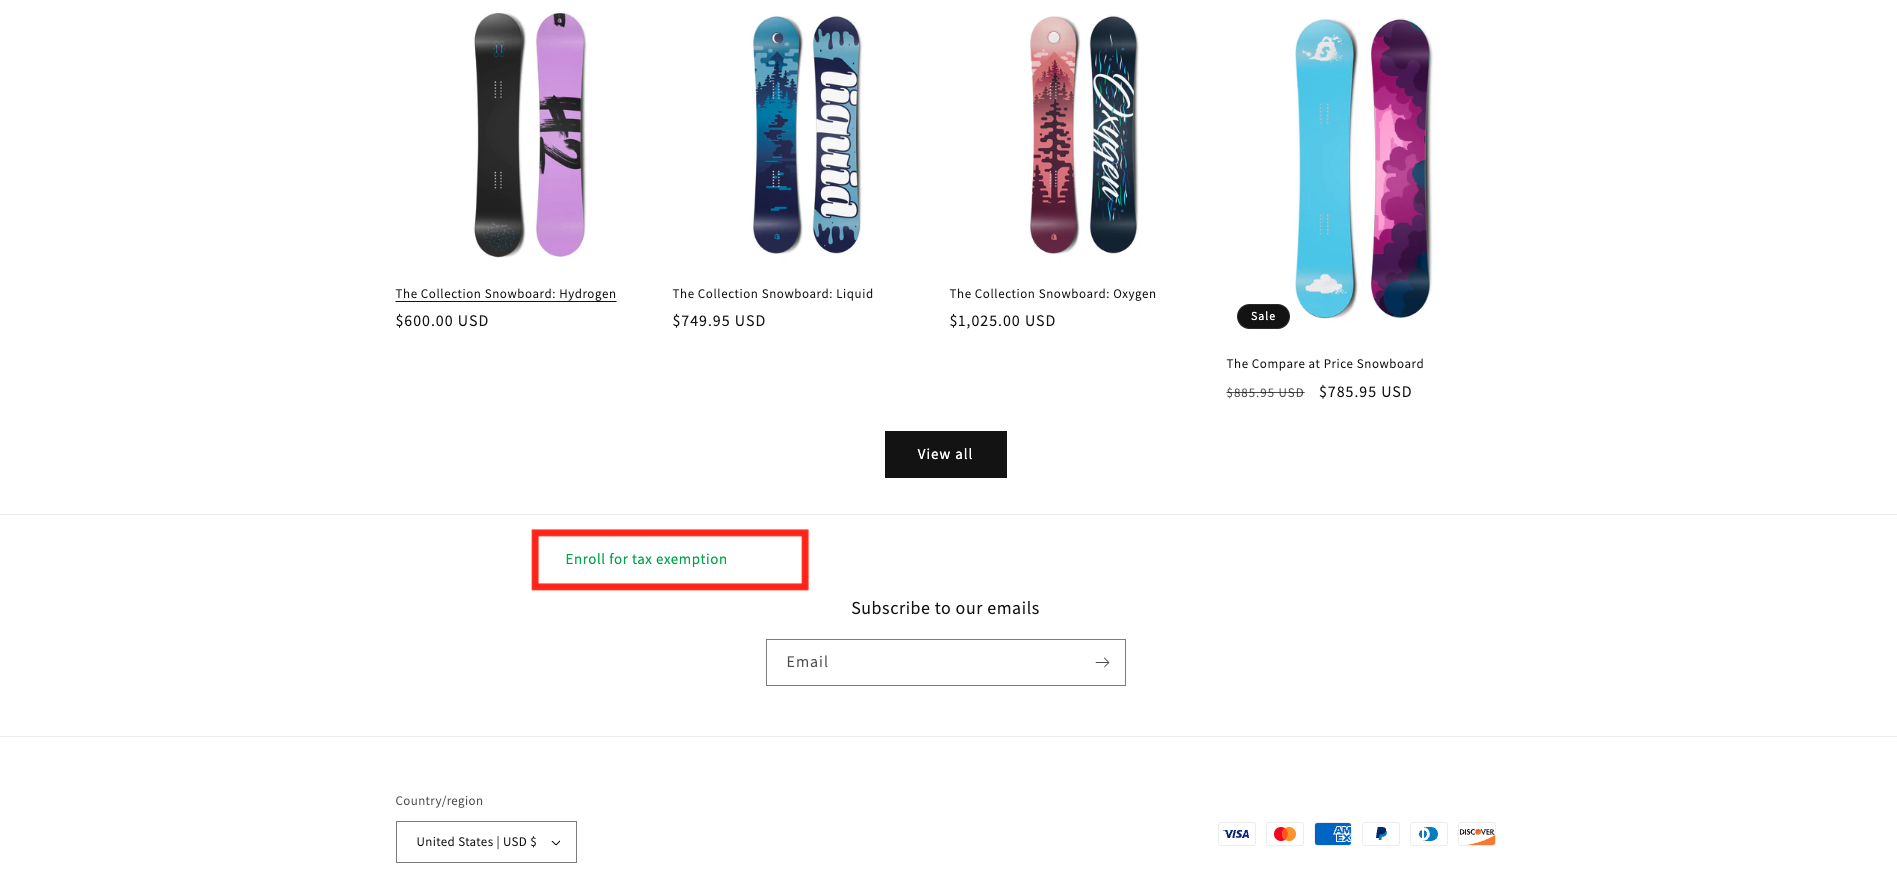
Confirm that the TaxWisp extension has been added to the footer of your online store. You should see the text "Enroll for Tax Exemption" alongside other footer items.
-
If the text extension does not appear in the footer, you may have missed a step. In that case, repeat the process carefully to ensure that the TaxWisp footer extension is successfully added, allowing customers to interact with the app and begin the tax exemption process.
This text link "Enroll for Tax Exemption" will now appear in your store’s footer and can be used by customers to access the TaxWisp sales tax exemption request flow.
Video Tutorial: How to add TaxWisp Extensions to your Shopify Store?
Learn how to easily add TaxWisp extensions to your Shopify store to help customers submit tax exemption requests. This video tutorial walks you through adding the TaxWisp icon (%) to your store header, enabling the product page extension for direct exemption access, and adding a text-based link in the footer. These steps ensure customers can find and use TaxWisp wherever they are on your store. Perfect for all Shopify stores, regardless of your plan.
Step 8: Start Using TaxWisp
- With TaxWisp installed and configured, you're ready to start offering tax-exempt status to your customers during the checkout process.
- Please note that the store can only collect taxes from a specific jurisdiction if they have a store presence within that jurisdiction.
- Monitor exemption requests, track exemption statuses, and manage customer exemptions efficiently using the app dashboard.
- Enjoy the benefits of streamlined tax exemption processes and enhanced customer satisfaction!
If you encounter any issues during the installation process or need assistance with using TaxWisp, don't hesitate to reach out to our Support Team for help. We're here to ensure a smooth and successful experience with our app.